Mini Cheesecake Pavlovas: The Perfect Bite-Sized Dessert for Any Occasion

Mini cheesecake pavlovas with berries on rustic table

Introduction

Mini cheesecake pavlovas are a delightful fusion of two classic desserts—light, crisp meringue shells and rich, tangy cheesecake filling. These bite-sized treats are not only visually stunning but also offer a satisfying contrast of textures and flavors that make them ideal for special occasions, holidays, or casual gatherings.

In this detailed guide, we’ll walk you through everything you need to know to make perfect mini cheesecake pavlovas from scratch. You’ll learn how to achieve the ideal meringue texture, whip up a no-bake cheesecake filling, and customize your toppings with fresh fruit, sauces, or a dusting of powdered sugar. Whether you’re baking for a crowd or just want a sweet treat that feels a little fancy, this guide has you covered.

Don’t miss our Perfect Chocolate Lava Cakes for another crowd-pleasing dessert with a gooey center.

Print
clock clock iconcutlery cutlery iconflag flag iconfolder folder iconinstagram instagram iconpinterest pinterest iconfacebook facebook iconprint print iconsquares squares iconheart heart iconheart solid heart solid icon
Mini pavlovas plated for presentation

Mini Cheesecake Pavlovas: The Perfect Bite-Sized Dessert for Any Occasion


5 Stars 4 Stars 3 Stars 2 Stars 1 Star

No reviews

  • Author: Amellia
  • Total Time: 30 minutes
  • Yield: 810 mini pavlovas 1x

Description

Mini Cheesecake Pavlovas are the show-stopping dessert you need right now. 🍓 Rich, crispy, and creamy—here’s your step-by-step guide to making them perfect.


Ingredients

Scale
  • 4 egg whites

  • 1 cup superfine sugar

  • 1 tsp vinegar

  • 1 tsp cornstarch

  • 1 tsp vanilla extract

  • 8 oz cream cheese

  • 1/2 cup powdered sugar

  • 1/2 tsp vanilla

  • 1/2 cup heavy cream

  • Fresh fruits and toppings of choice


Instructions

  • Whip egg whites to stiff peaks, gradually adding sugar.

  • Fold in cornstarch, vinegar, vanilla.

  • Shape mini nests on parchment, bake at 225°F for 60–75 mins. Cool completely.

  • Beat cream cheese, sugar, and vanilla. Fold in whipped cream. Chill.


  • Fill cooled shells. Add toppings. Serve immediately.

  • Prep Time: 20 minutes
  • Cook Time: 75 minutes

Understanding the Basics of Mini Cheesecake Pavlovas

What Are Mini Cheesecake Pavlovas?

Mini cheesecake pavlovas are an elegant twist on the traditional pavlova dessert. Originally from Australia and New Zealand, a pavlova typically consists of a large meringue base topped with whipped cream and fresh fruit. This mini version, however, adds a creamy cheesecake filling in place of whipped cream, resulting in a richer, more indulgent dessert—all in a convenient single-serve format.

The base is made from egg whites, whipped until stiff and baked low and slow to create a crisp exterior with a soft, marshmallow-like interior. Once cooled, the centers are filled with a silky cheesecake mixture and finished with fresh berries or seasonal fruit.

This combo offers a modern update to a beloved classic and is ideal for parties, baby showers, brunches, and even romantic dinners.

There’s a good reason why mini cheesecake pavlovas have become a hit in home kitchens and bakeries alike. They strike the perfect balance between light and decadent, making them feel indulgent without being overly heavy.

They also score major points in presentation—those glossy meringue shells and vibrant fruit toppings are always a showstopper. And because they’re portioned individually, they make serving and storing incredibly simple.

Some other reasons people love these mini pavlovas:

ReasonBenefit
Easy to CustomizeSwitch up the fruit, drizzle with sauces, or add chocolate shavings.
Make-Ahead FriendlyPrepare the shells ahead of time and assemble just before serving.
Naturally Gluten-FreeGreat for guests with dietary restrictions.
No Baking Required for the FillingKeeps the process simple and fast.

Looking for inspiration? Try our Baklava Bread Pudding Recipe a creative fusion dessert that plays with creamy and crunchy textures, just like pavlovas.

Key Ingredients You’ll Need

To get started with mini cheesecake pavlovas, you only need a handful of basic ingredients. Here’s a quick breakdown:

For the Meringue:

  • Egg whites (room temperature)
  • Granulated sugar
  • Cream of tartar or vinegar
  • Cornstarch
  • Vanilla extract

For the Cheesecake Filling:

  • Cream cheese (softened)
  • Powdered sugar
  • Vanilla extract
  • Heavy cream or sour cream (for a lighter texture)

Toppings (Optional):

  • Fresh fruit (berries, kiwi, mango)
  • Fruit compotes
  • Lemon curd
  • Chocolate sauce
  • Mint leaves for garnish

Each component plays a key role in building layers of flavor and texture. The result? A dessert that’s crisp, creamy, sweet, and fresh—all in one bite.

How to Make the Perfect Meringue Base for Mini Cheesecake Pavlovas
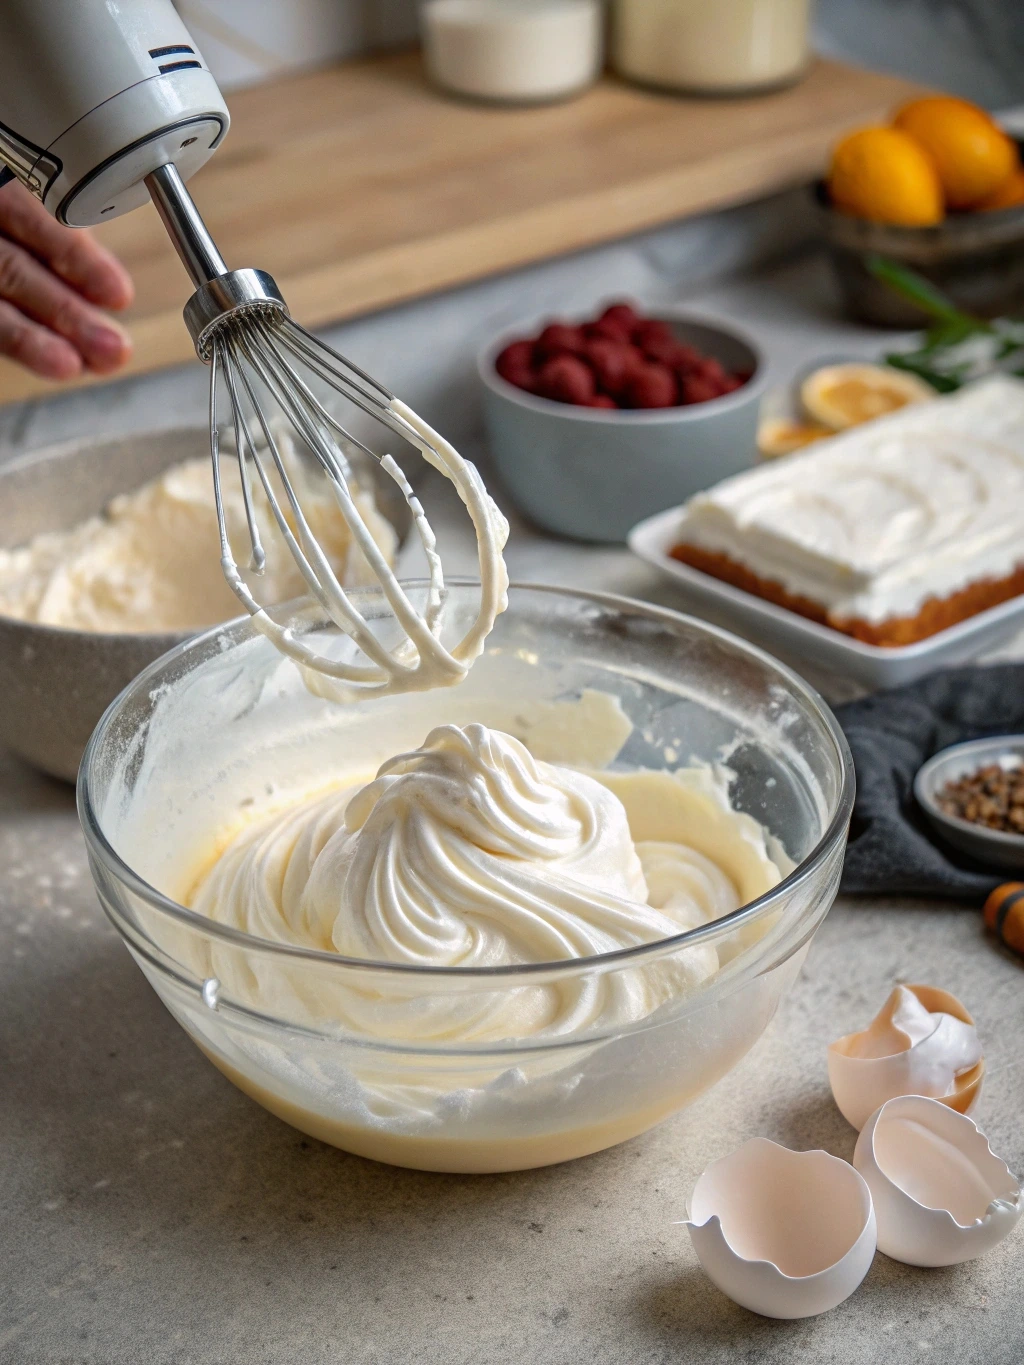
Whipping meringue for mini pavlovas

Mastering the Meringue Shells

The success of mini cheesecake pavlovas hinges on nailing the meringue base. This crispy, cloud-like shell is the heart of the dessert—light as air on the outside with a soft, marshmallowy center.

To make the perfect meringue, start with room temperature egg whites. Cold whites don’t whip up as well and won’t give you the volume needed. Add a pinch of cream of tartar or a splash of white vinegar to help stabilize the egg whites as they whip.

Gradually beat in superfine sugar until the mixture forms glossy, stiff peaks. You’ll know you’ve hit the sweet spot when you can flip the bowl upside down and nothing moves.

Common Meringue Mistakes to Avoid

Making meringue isn’t difficult, but there are a few key pitfalls to watch out for:

MistakeFix
Greasy bowl or utensilsAlways clean your mixing bowl thoroughly. Fat interferes with whipping.
Adding sugar too fastAdd sugar gradually to avoid deflating the whites.
OverbeatingStop once stiff peaks form; overbeating can cause grainy texture.

Shaping and Baking the Mini Meringues

Once your meringue is ready, spoon or pipe it onto a parchment-lined baking sheet. Create little nests by using the back of a spoon to press a small dip into the center of each mound—this is where your cheesecake filling will go later.

Bake the shells low and slow—225°F (about 110°C)—for about 60–75 minutes. Then, turn off the oven and let them cool completely inside with the door slightly ajar. This prevents sudden temperature changes that cause cracks or collapsing.

Whipping Up the No-Bake Cheesecake Filling

Creating the Creamy Cheesecake Center

Now that your meringue shells are baked and cooled, it’s time to prepare the luscious filling that takes mini cheesecake pavlovas to the next level. Unlike traditional baked cheesecake, this version is no-bake, quick, and incredibly creamy.

Start with room temperature cream cheese to avoid lumps and ensure smooth blending. Using a hand mixer or stand mixer, beat the cream cheese until fluffy. Then, slowly incorporate powdered sugar and vanilla extract. The powdered sugar adds sweetness while also helping to stabilize the mix.

To create a light, mousse-like texture, fold in whipped heavy cream or sour cream. This step is key for giving the filling that cloud-like feel that pairs beautifully with the crisp meringue base.

Optional Flavor Boosters:

  • A splash of lemon juice or zest for brightness
  • Almond or coconut extract for added depth
  • Melted white chocolate for richness

This creamy base is versatile, and small tweaks can dramatically shift the overall flavor profile—perfect for seasonal or themed desserts.

Filling and Chilling for Best Results

Once the cheesecake filling is fully blended, it’s best to chill it for at least 30 minutes to firm up before assembling your mini pavlovas. This not only improves the texture but also makes piping or spooning it into the meringue nests easier and cleaner.

You can transfer the filling to a piping bag with a star or round tip for a bakery-style presentation, or simply spoon it in for a rustic, homemade look.

Topping Ideas to Elevate Your Mini Cheesecake Pavlovas
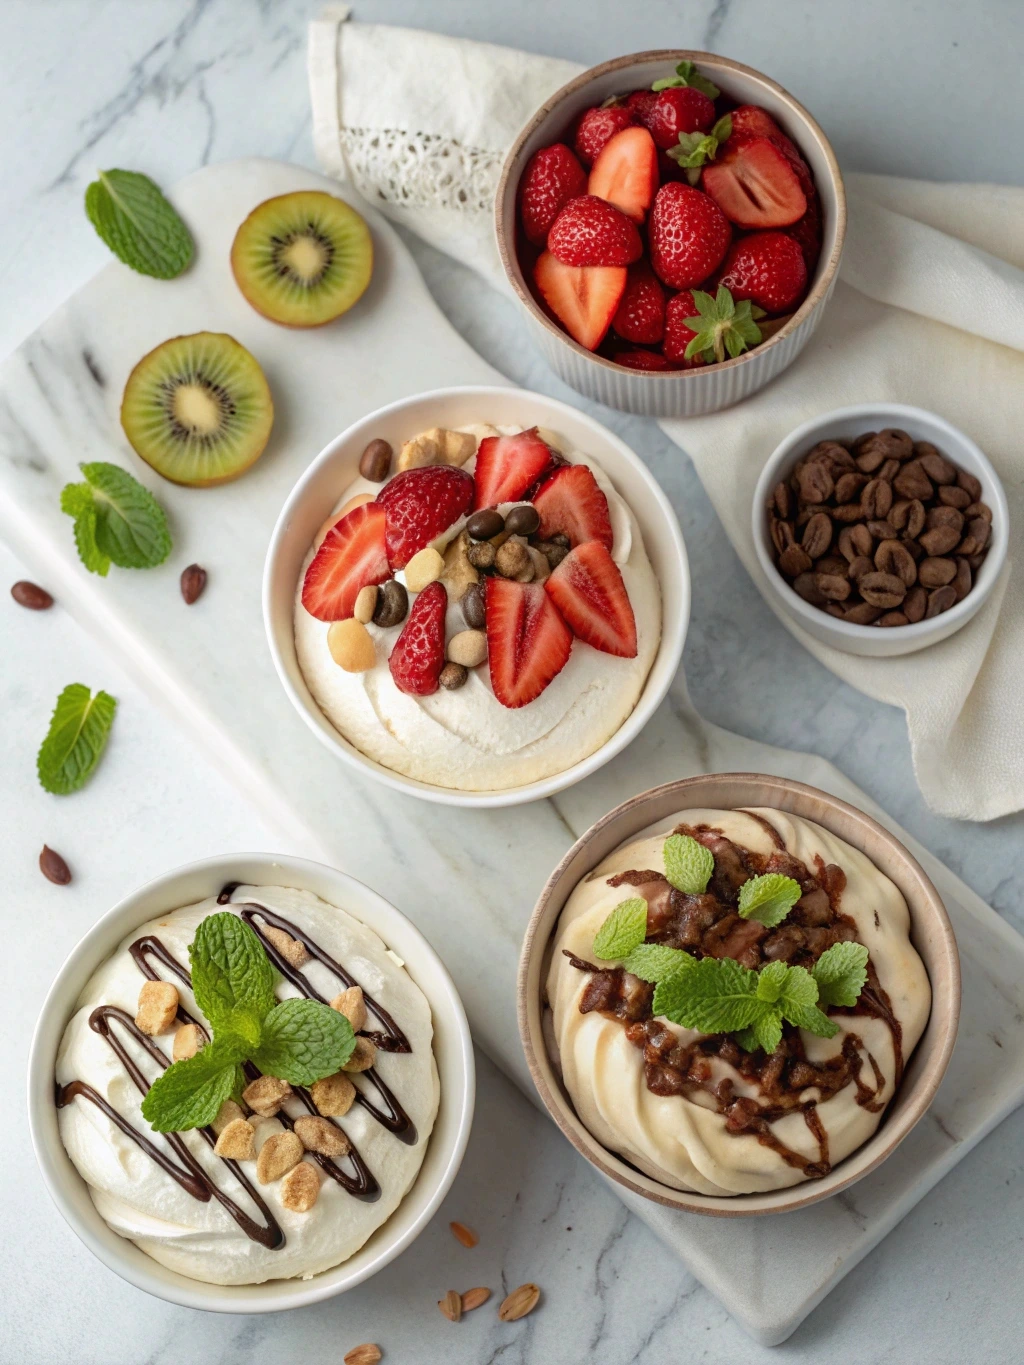
Pavlova toppings in bowls

Fresh Fruit: The Classic Pavlova Garnish

Nothing complements the creamy filling and crisp meringue of mini cheesecake pavlovas quite like fresh fruit toppings. They add color, brightness, and a natural sweetness that balances the richness of the cheesecake base.

Here are some top fruit choices to consider:

FruitFlavor NotesPairs Well With
StrawberriesSweet & tangyBalsamic drizzle, mint
BlueberriesJuicy & mildLemon zest, honey
KiwiTart & tropicalCoconut flakes
RaspberriesBold & slightly sourDark chocolate, vanilla
MangoSmooth & floralLime zest, coconut cream

Cut fruit into small, bite-sized pieces and arrange artfully on top of each pavlova for a polished, professional look.

Drizzles, Dusts, and Decorative Touches

Take your mini cheesecake pavlovas from homemade to high-end by adding finishing touches that elevate presentation and flavor.

Sauces and Drizzles:

  • Fruit coulis (like raspberry or strawberry)
  • Salted caramel
  • Dark chocolate ganache
  • Lemon curd

Toppings and Garnishes:

  • Shaved white or dark chocolate
  • Toasted nuts (almonds, pistachios)
  • Edible flowers for a gourmet touch
  • A dusting of powdered sugar for elegance

These small additions not only enhance the overall taste but also boost visual appeal, making your pavlovas irresistible at first glance.

Check out our Baklava Fusion Dessert for topping ideas with nuts, syrups, and cream that could inspire your pavlova garnish combinations.

Common Mistakes to Avoid When Making Mini Cheesecake Pavlovas

Mistake #1: Overbeating or Underbeating the Meringue

When whipping egg whites for mini cheesecake pavlovas, the consistency of the meringue matters more than you might think. If underbeaten, the whites won’t hold their shape. If overbeaten, they’ll become grainy and collapse in the oven.

How to fix it: Whip egg whites until stiff, glossy peaks form. When you lift the beaters, the meringue should stand tall without drooping. The mixture should also feel smooth when rubbed between your fingers—if it feels gritty, the sugar isn’t fully dissolved yet.

Mistake #2: Baking Too Hot or Too Fast

Mini pavlovas are delicate. A high baking temperature can cause them to brown, crack, or collapse. The key to success lies in low and slow baking, followed by gradual cooling.

Tip: Bake at 225°F (110°C) for 60–75 minutes. Then, turn off the oven and let them cool completely inside with the door slightly ajar. Sudden temperature shifts cause cracking and collapsing.

Mistake #3: Filling Too Early

Because meringue shells are highly sensitive to moisture, adding the cheesecake filling too early causes the base to soften and lose its crisp structure.

Solution: Fill the meringue nests just before serving. You can pipe or spoon the cheesecake mix into the shells after chilling it. This keeps the texture contrast sharp and fresh.

Mistake #4: Skipping the Parchment Paper

Placing meringue directly on the baking tray can result in sticking, burning, or uneven shapes.

Fix it fast: Always use parchment paper or a non-stick silicone baking mat. Lightly mark circles using a cup or cookie cutter as a guide for uniform mini pavlovas.

Mistake #5: Storing Incorrectly

After baking, many bakers ruin their individual pavlovas by storing them improperly. Meringue is sensitive to humidity and should never be refrigerated without protection.

Correct method: Store unfilled shells in an airtight container at room temperature for up to 2 days. Once filled, serve immediately or within 1–2 hours.

Make-Ahead Tips and Storage for Mini Cheesecake Pavlovas

Can You Make Mini Cheesecake Pavlovas in Advance?

Absolutely. One of the best things about mini cheesecake pavlovas is that they’re a make-ahead dessert dream—as long as you assemble them at the right time. With a bit of planning, you can break down the process into parts, making prep easier and serving stress-free.

Here’s a smart prep-ahead strategy:

ComponentMake-Ahead TimeStorage Tip
Meringue ShellsUp to 2 daysStore in airtight container at room temperature
Cheesecake FillingUp to 3 daysRefrigerate in sealed container
Fruit ToppingsDay ofKeep washed, cut, and chilled

This method helps you save time without compromising texture or flavor. It also makes these individual cheesecake desserts perfect for dinner parties, holiday events, or brunches.

Best Practices for Storing Mini Cheesecake Pavlovas

The key to keeping your mini pavlova bites fresh is knowing how to store each element separately.

For Meringue Shells:

  • Store in a cool, dry place.
  • Keep them away from humidity—avoid the fridge until they’re filled.
  • Use parchment paper to separate layers if stacking.

For Cheesecake Filling:

  • Store in the fridge in an airtight container.
  • Stir gently before using if it stiffens slightly.
  • Don’t freeze the filling—it affects the creamy texture.

Assembled Pavlovas:

Once assembled, these should be served immediately. If you need to store filled pavlovas for a short time:

  • Place them on a tray and cover loosely with plastic wrap.
  • Keep them in the fridge for no more than 2 hours.
  • Know that the meringue will start softening due to the moisture in the filling.

Seasonal Variations and Flavor Combinations for Mini Cheesecake Pavlovas

Mini Cheesecake Pavlovas for Every Season

One of the greatest advantages of mini cheesecake pavlovas is how easily you can tailor them to any season or event. From summery berry toppings to cozy holiday flavors, the base remains the same while your presentation and ingredients can reflect the time of year.

Spring:

  • Toppings: Strawberries, rhubarb compote, edible flowers
  • Filling Twist: Add lemon zest to the cheesecake base
  • Garnish: Mint sprigs and a drizzle of honey

Summer:

  • Toppings: Fresh blueberries, peaches, blackberries
  • Filling Twist: Whip in a bit of Greek yogurt for tang
  • Garnish: Crushed graham crackers or coconut flakes

Fall:

  • Toppings: Caramelized apples or pears, candied pecans
  • Filling Twist: Blend in pumpkin purée and cinnamon
  • Garnish: Maple syrup drizzle, nutmeg sprinkle

Winter:

  • Toppings: Pomegranate seeds, sugared cranberries
  • Filling Twist: Add a splash of peppermint extract or orange zest
  • Garnish: White chocolate shavings, cocoa dusting

Unique Flavor Combinations to Try

If you’re looking to move beyond traditional fruit toppings, there’s a world of bold combinations that can elevate your individual pavlova desserts from delightful to unforgettable.

Flavor ComboDescription
Chocolate & RaspberryAdd cocoa powder to the filling, top with fresh raspberries and dark chocolate curls
Coconut & PineappleStir shredded coconut into the base, finish with pineapple chunks and lime zest
Matcha & MangoInfuse cheesecake with matcha powder, garnish with ripe mango slices
Salted Caramel & BananaSwirl caramel into the filling and layer with banana slices and crushed toffee
Espresso & HazelnutAdd instant espresso to filling, top with chopped hazelnuts and chocolate drizzle

Pro tip: When experimenting, always keep balance in mind—acidity from fruit can offset richness from the cheesecake, and crunchy toppings add texture contrast to the soft interior.

How to Serve and Present Mini Cheesecake Pavlovas Like a Pro
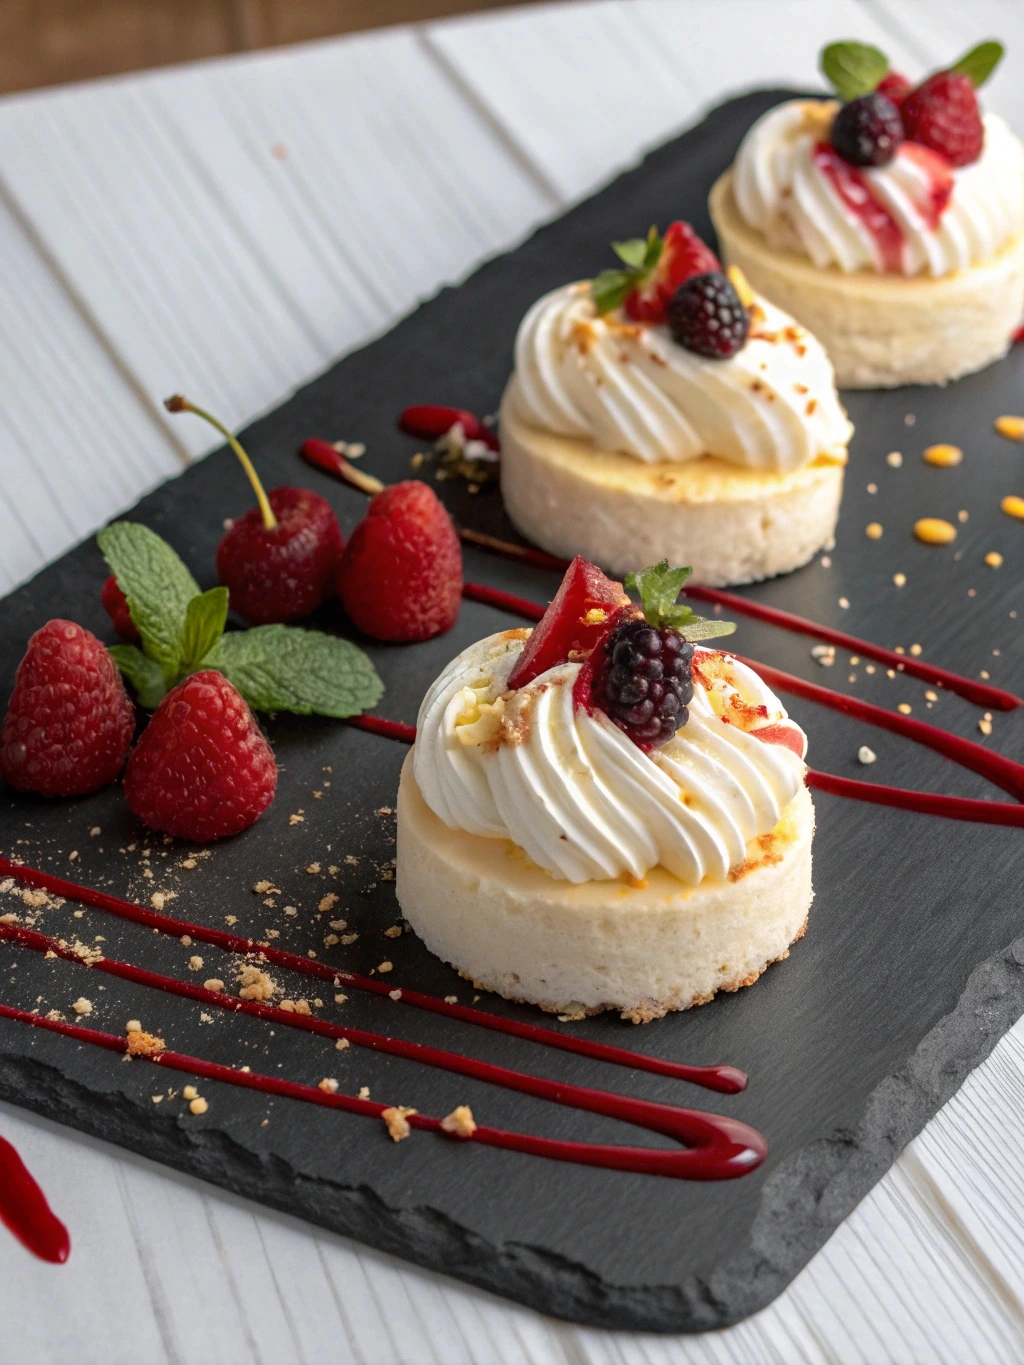
Mini pavlovas plated for presentation

Plating for Maximum Visual Impact

When it comes to mini cheesecake pavlovas, presentation is half the experience. Their beautiful layers and colors already make them impressive, but with a few plating tricks, you can elevate them to restaurant quality right at home.

Smart Plating Tips:

  • Use white or neutral-toned plates to make the toppings pop.
  • Stagger the pavlovas on a large platter rather than placing them in rows—this gives a more natural, boutique-style display.
  • Add a swoosh of sauce on the plate (berry coulis, caramel, or chocolate) under or beside each pavlova for added flair.
  • Top each pavlova with a fresh mint leaf or edible flower for a polished look.

Check out our Guide to Plating Desserts Like a Pastry Chef to impress guests with professional flair.

Creating a Dessert Bar with Pavlovas

Want to entertain a crowd or offer more variety? Turn your mini cheesecake pavlovas into a fun, interactive dessert bar. Let guests customize their own pavlova with different toppings and sauces.

What to Include in a DIY Pavlova Bar:

  • Meringue shells (pre-baked)
  • Cheesecake filling (in a piping bag or bowl)
  • Bowls of fresh fruit: berries, mango, kiwi, pineapple
  • Sauces: chocolate ganache, lemon curd, caramel
  • Crunchy toppings: nuts, toasted coconut, crushed cookies
  • Garnishes: mint leaves, powdered sugar, edible flowers

Label each ingredient and include small spoons and tongs for easy self-service. It’s a crowd-pleaser and adds an interactive element to your gathering.

Pairing Pavlovas with Drinks

Pairing drinks with dessert brings out complementary flavors and creates a memorable experience. Consider these matches for your mini pavlova bites:

DrinkWhy It Works
Sparkling wineBalances sweetness with acidity
Coffee or espressoCuts through richness of cheesecake
Fruit-infused teaEnhances fruit toppings
White dessert wineAdds a luxurious, sweet note

Mini Cheesecake Pavlovas FAQs Answered

Can I make these mini cheesecake pavlovas ahead of time?

Yes, you can! Mini cheesecake pavlovas are great for prepping in stages. The meringue shells can be made up to two days in advance—just store them in an airtight container at room temperature, away from moisture and heat. The cheesecake filling can be refrigerated for up to three days before assembling.
However, it’s important not to assemble the pavlovas until just before serving. Adding the filling too early will cause the meringue to soften and lose its crispy texture. If you’re hosting an event, prep the components ahead and do a quick assembly right before dessert time.

Can I turn this into one giant pavlova?

Definitely! If you’re looking to make a bold statement, you can easily turn your mini cheesecake pavlovas into a single, show-stopping giant pavlova. The ingredients stay the same—you’ll just adjust the baking time and shape.
make a large pavlova:
Spoon the meringue into a 9–10 inch round nest on a baking sheet lined with parchment paper.
Bake at 225°F (110°C) for 1.5–2 hours.
Let it cool completely in the oven with the door slightly ajar.
Once cooled, top with your cheesecake filling and favorite fruit or sauces. It makes an incredible centerpiece for celebrations and looks beautiful on a cake stand.

Conclusion: Your New Go-To Dessert – Mini Cheesecake Pavlovas

Whether you’re entertaining guests or just want a little indulgence for yourself, mini cheesecake pavlovas offer everything you could ask for in a dessert—crispy meringue shells, rich cheesecake filling, and endless topping possibilities. They’re visually stunning, versatile, and surprisingly easy to make when you follow the right steps.

You’ve now got a full breakdown—from baking flawless meringue to creating seasonal variations and mastering storage tips. Plus, with make-ahead options and presentation tricks, you can enjoy this elegant dessert without last-minute stress.

Discover great ideas like our Chocolate Lava Cake Tutorial to master texture contrasts in desserts.

For more recipes, visit our facebook page

Baklava Bread Pudding: The Best Fusion Dessert You Must Try

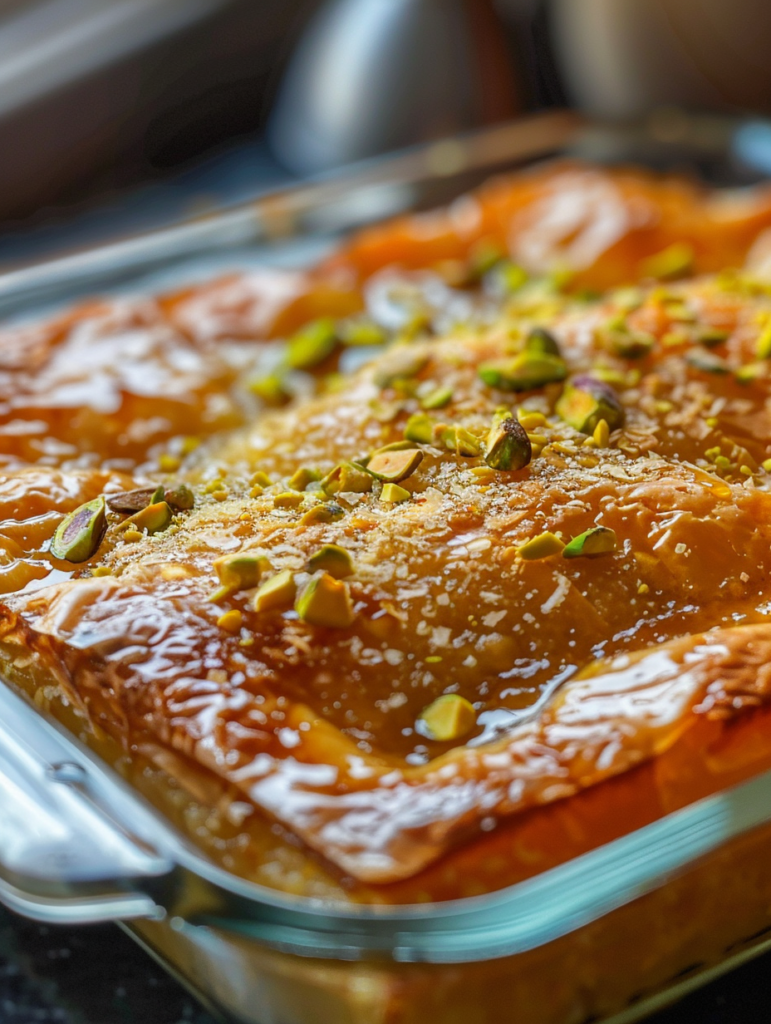
baklava bread pudding with crisp top and syrup drizzle

Introduction

Baklava Bread Pudding is the ultimate comfort-meets-culture dessert fusion that transforms classic recipes into something unforgettable. Combining the flaky, syrup-soaked layers of Middle Eastern baklava with the creamy, custardy base of traditional bread pudding, this dish is a rich, flavorful masterpiece that delivers on both texture and taste.

If you’re a dessert lover looking for something unique, this hybrid recipe will blow your mind. Whether you’re hosting a holiday dinner or craving something cozy for a weekend treat, baklava bread pudding brings together the best of two dessert worlds. In this in-depth guide, you’ll learn how to make it step by step, master texture balance, play with bold flavor variations, and even understand how it compares to other popular desserts like molten chocolate cake.

Love rich, indulgent sweets? Try our Perfect Chocolate Lava Cakes, a gooey, decadent treat that’s sure to impress at any dinner party.

Print
clock clock iconcutlery cutlery iconflag flag iconfolder folder iconinstagram instagram iconpinterest pinterest iconfacebook facebook iconprint print iconsquares squares iconheart heart iconheart solid heart solid icon
baklava bread pudding with crisp top and syrup drizzle

Baklava Bread Pudding


5 Stars 4 Stars 3 Stars 2 Stars 1 Star

No reviews

  • Author: Amellia
  • Total Time: 1 hour 10 minutes

Description

Baklava Bread Pudding is the fusion dessert you didn’t know you needed. Layers of nuts, syrup, and custard—made to impress!


Ingredients

Brioche bread, eggs, milk, cream, sugar, cinnamon, vanilla, chopped walnuts, honey, rosewater


Instructions

Prepare custard, layer with nuts and bread, bake, drizzle syrup, serve warm.

Notes

Baking dish, mixing bowls, saucepan, whisk

Best served warm with pistachio ice cream or Turkish coffee

  • Prep Time: 20 minutes
  • Cook Time: 50 minutes
  • Cuisine: Fusion (Middle Eastern–European)

Nutrition

  • Calories: Approx. 350–450 per serving

What is Baklava Bread Pudding?

Origins of Baklava and Bread Pudding

To understand the brilliance of Baklava Bread Pudding, you first need to know its parents.

Baklava is a traditional dessert beloved in Greek, Turkish, and Middle Eastern cuisine. It’s made with thin, flaky layers of phyllo dough, chopped nuts—often pistachios or walnuts—and sweet syrup or honey. The flavors are intense and aromatic, thanks to spices like cinnamon and clove and floral hints from rose or orange blossom water.

On the flip side, bread pudding has deep roots in European kitchens, especially British and French cuisines. Traditionally made with stale bread, eggs, milk, and sugar, it’s a frugal dessert that transforms leftovers into a creamy, custard-filled treat.

Bringing the two together isn’t just innovative—it’s genius. You get the flaky, syrupy richness of baklava embedded in the luscious custard base of bread pudding. It’s tradition reimagined for modern dessert lovers.

Why Combine the Two: A Perfect Cultural Dessert Fusion

So why merge baklava with bread pudding? Because together, they solve each other’s limitations and double the flavor potential.

  • Baklava can be too sweet or dry for some. When baked into a bread pudding, it softens and balances out with creaminess.
  • Bread pudding can feel too heavy or bland. Adding nuts, spices, and syrupy layers gives it brightness and depth.

This is why baklava bread pudding works so well: it’s a dessert hybrid that hits all the right notes—crunchy, creamy, sweet, and aromatic.

Looking for more fusion desserts? Don’t miss our Tandoori Chicken Naan Buns – The Ultimate Homemade Fusion Delight — a savory twist that blends bold Indian flavors with soft, fluffy bread.

Ingredients That Make Baklava Bread Pudding Unique

baklava bread pudding ingredients on wooden board
Key ingredients for the perfect baklava bread pudding

Traditional Baklava Ingredients with a Twist

The magic of Baklava Bread Pudding begins with the ingredients. While both baklava and bread pudding have their own distinctive elements, combining them means rethinking how each component adds flavor and texture.

Classic baklava ingredients include:

  • Phyllo dough
  • Chopped nuts (typically pistachios, walnuts, or almonds)
  • Sweet syrup made from honey or sugar, sometimes with lemon juice
  • Warm spices like cinnamon and clove
  • Aromatics like rosewater or orange blossom water

In baklava bread pudding, you retain all these essentials, but you use them in a layered, baked custard format. Instead of relying solely on phyllo, you integrate pieces of bread—often soaked in a spiced egg-milk mixture—to carry the custard component of a traditional bread pudding.

To preserve the crunchiness of the phyllo, many recipes recommend sprinkling baked sheets on top rather than layering throughout. This technique allows the top to crisp up while the interior remains creamy and custardy.

Best Breads to Use for Perfect Texture and Flavor

Choosing the right bread is just as important as selecting quality nuts or fresh spices. The wrong bread can make your pudding too soggy or too dense. Here are the top bread types ideal for making baklava bread pudding:

Bread TypeTexture ContributionFlavor Benefit
BriocheSoft & ButterySlightly sweet, rich
ChallahFirm but tenderLightly sweet, eggy
CroissantsFlaky, lightButtery, layered
Day-old FrenchAbsorbs wellNeutral base for spices
PanettoneSoft & spongySweet, aromatic

Pro tip: Let your bread sit out overnight to dry slightly. Stale bread absorbs the custard better and avoids turning to mush during baking.

The richness of brioche or the flaky texture of croissants beautifully echoes baklava’s decadence. When paired with a custard made of heavy cream, sugar, eggs, and spices, these breads soak up the flavors while maintaining just the right amount of structure.

Step-by-Step Recipe for Baklava Bread Pudding

Prepping Your Ingredients: Bread, Syrup, Nuts

Before you start assembling your Baklava Bread Pudding, it’s essential to get all your components ready. Preparation makes baking smoother and helps preserve the layered texture and distinct flavors.

Ingredients List:

For the pudding base:

  • 6 cups cubed brioche or challah (day-old preferred)
  • 4 eggs
  • 2 cups whole milk
  • 1 cup heavy cream
  • ½ cup sugar
  • 1 tsp cinnamon
  • 1 tsp vanilla extract
  • ¼ tsp salt

For the nut mix:

  • 1 cup chopped walnuts or pistachios (or a mix)
  • 1 tsp ground cinnamon
  • 1 tbsp brown sugar

For the syrup:

  • ½ cup honey
  • ½ cup water
  • 1 tbsp lemon juice
  • 1 tsp rosewater (optional but authentic)

For topping:

  • Crumbled, pre-baked phyllo dough or crushed filo shells
  • Extra chopped nuts for garnish

Step 1: Make the Syrup First
Start by combining honey, water, and lemon juice in a small saucepan. Bring to a boil, then reduce heat and simmer for 8–10 minutes until slightly thickened. Add rosewater at the end and let it cool.

Step 2: Prepare the Nut Mix
In a bowl, mix your chopped nuts with brown sugar and cinnamon. Set aside.

Step 3: Whisk the Custard
In a large bowl, whisk together the eggs, milk, cream, sugar, cinnamon, vanilla, and salt. This custard will soak into the bread and create a rich, creamy base.

Step 4: Layer the Bread and Nuts
Grease a 9×13-inch baking dish. Place half of the cubed bread at the bottom. Sprinkle half the nut mix over it. Add the remaining bread, then the rest of the nuts. Pour the custard slowly over everything, pressing lightly to help the bread soak it up.

Let it sit for 30 minutes so the custard absorbs fully.

Baking Instructions and Optimal Temperatures

Step 5: Bake the Pudding
Preheat your oven to 350°F (175°C). Cover the baking dish with foil and bake for 30 minutes. Then remove the foil and bake an additional 20 minutes until the top is golden brown and slightly crispy.

Step 6: Add the Finishing Touches
After removing the pudding from the oven, drizzle the cooled syrup over the top evenly. Sprinkle with crumbled baked phyllo and extra nuts while still warm.

Let it sit for at least 15 minutes before serving to allow the flavors to settle.

Tips for Achieving the Perfect Texture

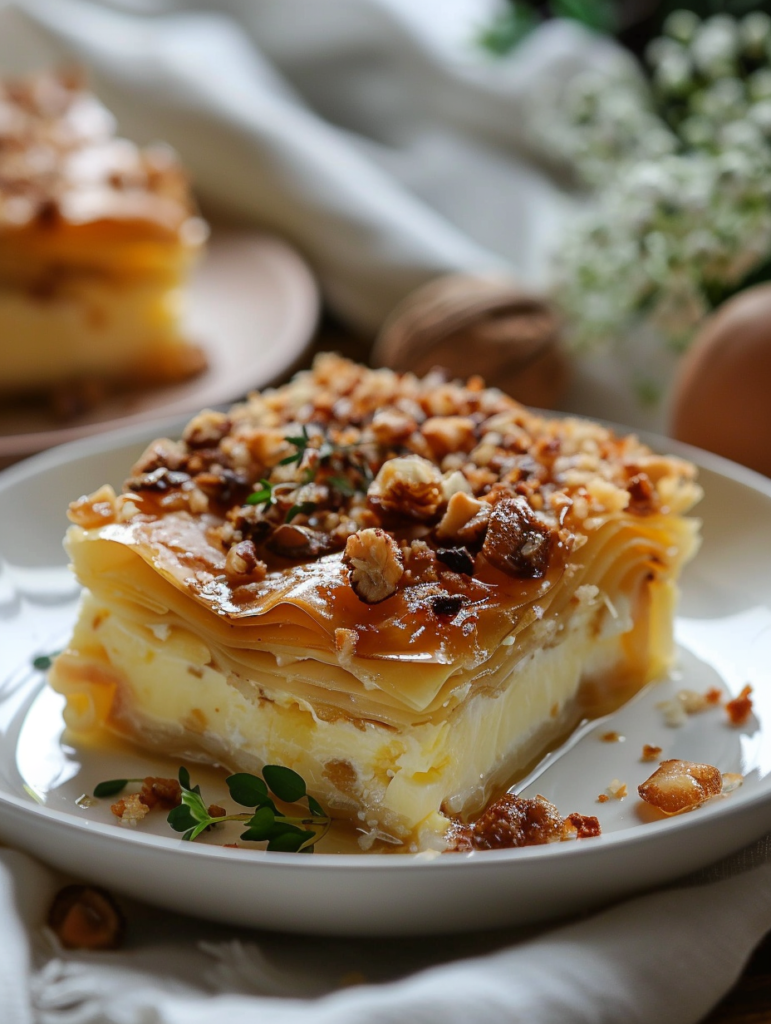
creamy slice of baklava bread pudding served warm
A perfect balance of crunch and custard in every slice

Avoiding Soggy or Dry Pudding

One of the biggest mistakes with Baklava Bread Pudding is getting the texture wrong. Too soggy, and it’s mushy; too dry, and it loses that creamy richness. Striking the perfect balance is all about precision and a few pro tips.

Here’s how to avoid soggy pudding:

  • Use day-old bread: Fresh bread breaks down too fast when soaked. Slightly stale bread holds up better under custard.
  • Pre-toast the bread cubes: Lightly toasting the bread in the oven for 10 minutes adds structure and reduces sogginess.
  • Don’t over-saturate: Pour just enough custard to cover the bread evenly, but not drown it. Press down gently to help it absorb.

To prevent dryness:

  • Cover with foil for the first half of baking to retain moisture.
  • Add syrup only after baking; this locks in moisture without turning the base soggy.
  • Use a water bath (bain-marie) during baking for even, gentle heat if you want a silkier finish.

The Secret to Crispy Tops and Creamy Centers

The ultimate Baklava Bread Pudding delivers a crunch on top with a lush, custard-soaked center. Here’s how to make that happen:

  1. Top Layer Strategy: Sprinkle crushed baked phyllo or filo shells just before baking uncovered in the final 20 minutes. This crisps up the top while the inside continues to bake gently.
  2. Nut Topping: Mix chopped nuts with a little butter and sugar before adding them on top. This caramelizes them slightly for a toasty crunch.
  3. Custard Ratio: For every 3 cups of bread, use 1 cup of liquid (milk + cream) and 1 egg. This keeps the center soft but not undercooked.

Chocolate Molten Lava Cake vs. Baklava Bread Pudding

What Chocolate is Best for Molten Lava Cake?

While Baklava Bread Pudding is all about nutty layers and syrupy richness, molten lava cake goes in a completely different direction: deep chocolate decadence. If you’re a chocoholic, you might wonder what kind of chocolate makes a molten lava cake truly unforgettable.

The answer? Dark chocolate with 60%–70% cocoa content.

Why?

  • It melts into a perfectly gooey center without being too runny.
  • It balances sweetness with richness.
  • It pairs beautifully with the buttery flavor of the cake itself.

Some high-end bakers even mix dark chocolate with a touch of semi-sweet to add complexity. Avoid using chocolate chips, which contain stabilizers and don’t melt smoothly.

Bonus tip: Add a pinch of espresso powder to intensify the chocolate notes.

Is Chocolate Lava Cake Just Undercooked Cake?

It might look that way — but it’s not. A true lava cake is engineered to have a liquid center, not just an underbaked middle. The batter is made specifically to cook from the outside in, with precise timing to maintain that flowing center while firming the edges.

The confusion comes from poor baking techniques, where some try to replicate lava cakes by simply underbaking a regular chocolate cake. That usually results in an uneven texture or unsafe batter.

Let’s compare this with Baklava Bread Pudding:

  • Lava cake is timing-dependent, baked for 12–14 minutes at high heat (around 425°F).
  • Bread pudding is custard-dependent, baked low and slow to allow the creamy base to set (usually 350°F for 45–50 minutes).

Baklava Bread Pudding offers a creamier, layered experience, while molten lava cake delivers a single-note but intense bite. They both satisfy different cravings — and frankly, they’re both worth mastering.

Key Differences: Molten Cake vs. Lava Cake

What is the Difference Between Molten Cake and Lava Cake?

It’s a dessert debate many sweet tooths have stumbled across—is there a real difference between molten cake and lava cake? The short answer? Yes, though the two are often used interchangeably.

Here’s a breakdown to clear the confusion:

FeatureMolten CakeLava Cake
Core TextureSoft throughoutFirm outside, gooey liquid center
StructureUniform, cake-likeContrast between outer cake and molten middle
Baking TimeSlightly longer, more evenShorter, high-heat bake
Common ConfusionMistaken as undercooked cakeEngineered for molten center
Serving TemperatureWarm, not necessarily hotBest served hot to experience “lava”

Molten cakes are often slightly denser and consistent in texture, while lava cakes feature a purposeful under-baked center that flows when cut. The magic of lava cake lies in the temperature and timing—it walks a fine line between cooked and liquid.

Where does Baklava Bread Pudding stand in all this?

While it doesn’t aim for a molten center, it delivers contrast in a different way: the crunch of phyllo or nuts on top, and the creamy custard base beneath. It’s not about a liquid core—it’s about layered complexity, where textures and flavors evolve with every bite.

Texture, Cooking Time, and Presentation Compared

Let’s take a quick look at how Baklava Bread Pudding compares to molten-style cakes across the major elements that define dessert appeal:

ElementBaklava Bread PuddingMolten Lava Cake
TextureCrunchy top, soft creamy interiorCrisp exterior, liquid core
Prep Time20 minutes10 minutes
Baking Time45–50 minutes12–14 minutes
PresentationSliced or scooped in dishesServed as individual domes
Flavor ProfileNutty, spiced, syrupyDeep chocolate, rich, bittersweet
Best ServedWarm, with syrup drizzleHot, with ice cream or cream

While lava cakes deliver a single punch of chocolate, baklava bread pudding is a slow-burning experience, packed with contrasting textures, aromatic spices, and nutty richness. Both are worthy showstoppers, but one is a layered narrative, and the other is a single-shot drama.

Creative Twists and Flavor Variations

Pistachio, Walnut, and Almond Variants

One of the most exciting aspects of Baklava Bread Pudding is how easy it is to adapt based on your preferences—or what’s in your pantry. Different nuts bring different flavors and textures, allowing you to tweak the experience without losing the core identity of the dessert.

Here are a few nut combinations to try:

Nut TypeFlavor ProfileBest Pairings
PistachiosButtery, slightly sweetRosewater, orange zest
WalnutsEarthy, slightly bitterCinnamon, clove
AlmondsMild, nuttyCardamom, vanilla, honey
HazelnutsToasty, sweetChocolate, coffee syrup

Try combining two types for added depth—like walnuts for body and pistachios for color and sweetness.

Adding Rosewater, Orange Blossom, or Chocolate

Ready to push your Baklava Bread Pudding into gourmet territory? These flavor enhancers take your dessert from classic to unforgettable.

Rosewater

  • A small amount (1 tsp) goes a long way.
  • Adds floral brightness and authenticity to Middle Eastern-style desserts.
  • Pairs best with pistachios and honey.

Orange Blossom Water

  • Offers a citrusy, delicate aroma.
  • Works well with almonds and cinnamon.
  • Enhances the syrup without overpowering it.

Chocolate

  • Yes, you can add chocolate—think chocolate chips in the custard or a dark chocolate drizzle after baking.
  • Use semi-sweet or bittersweet to complement the natural sweetness of the syrup.
  • Combine with hazelnuts for a Nutella-inspired twist.

Pro tip: A touch of espresso powder in the custard adds a mocha depth without making the pudding taste like coffee.

Serving Suggestions and Occasions

Ideal Pairings: Ice Creams, Coffees, and Wines

Serving Baklava Bread Pudding is as much about what goes with it as it is about the dessert itself. A good pairing enhances the experience, highlighting the pudding’s creamy custard, nutty crunch, and sweet syrup.

Ice Cream Pairings
The warm base of the bread pudding contrasts beautifully with cool, creamy scoops:

  • Vanilla bean – Classic choice that lets the spices and syrup shine.
  • Pistachio – Echoes the nutty elements in the pudding.
  • Rose or cardamom ice cream – Exotic flavors that complement Middle Eastern notes.
  • Salted caramel – Adds a savory twist to balance the sweetness.

Coffee Pairings
A bold cup of coffee cuts through the richness of the pudding:

  • Espresso – Intense and aromatic, ideal for after dinner.
  • Turkish coffee – Keeps it on-theme with bold spice and deep flavor.
  • Cinnamon latte – Brings the spice full circle with the dessert.

Wine Pairings
Yes, dessert wine works beautifully with Baklava Bread Pudding:

  • Muscat – Floral and sweet, perfect with rosewater-infused versions.
  • Sherry – Rich, nutty, and complements the texture.
  • Port wine – Deep red fruit notes accentuate the warm syrup.

When to Serve: Holidays, Brunches, or Dinner Parties

Baklava Bread Pudding isn’t just a dessert—it’s an occasion. Its luxurious flavor and inviting aroma make it a standout choice for all kinds of gatherings.

Here’s when it really shines:

OccasionWhy It Works
Holiday DinnersWarm spices and syrup make it festive
BrunchesServe warm with coffee or tea
Dinner PartiesElegant yet comforting; perfect showstopper
PotlucksEasy to make ahead and transport
Ramadan/EidCulturally relevant and celebratory
ThanksgivingA unique alternative to traditional pies

You can prep it a day ahead, store it chilled, and reheat just before serving. Add fresh garnishes—like orange zest, crushed nuts, or a drizzle of extra syrup—for maximum impact.

Storage, Leftovers, and Reheating Tips

How to Store Without Losing Crunch

One of the best things about Baklava Bread Pudding is how well it holds up for a few days—if you store it the right way. The key is to preserve the pudding’s custardy base without letting the crispy top get soggy.

Here’s how to store it properly:

  • Cool completely before storing: Trapping steam inside a container causes condensation, which softens the top layer.
  • Use airtight containers: Keep your pudding fresh by placing slices in a container with a tight seal.
  • Separate toppings if possible: If you’ve used phyllo crisps or extra nuts on top, store them separately and add them after reheating for extra crunch.

Refrigerator: Keeps fresh for 3–4 days
Freezer: Store tightly wrapped slices for up to 1 month (freeze without syrup for best texture)

Best Reheating Methods for Next-Day Enjoyment

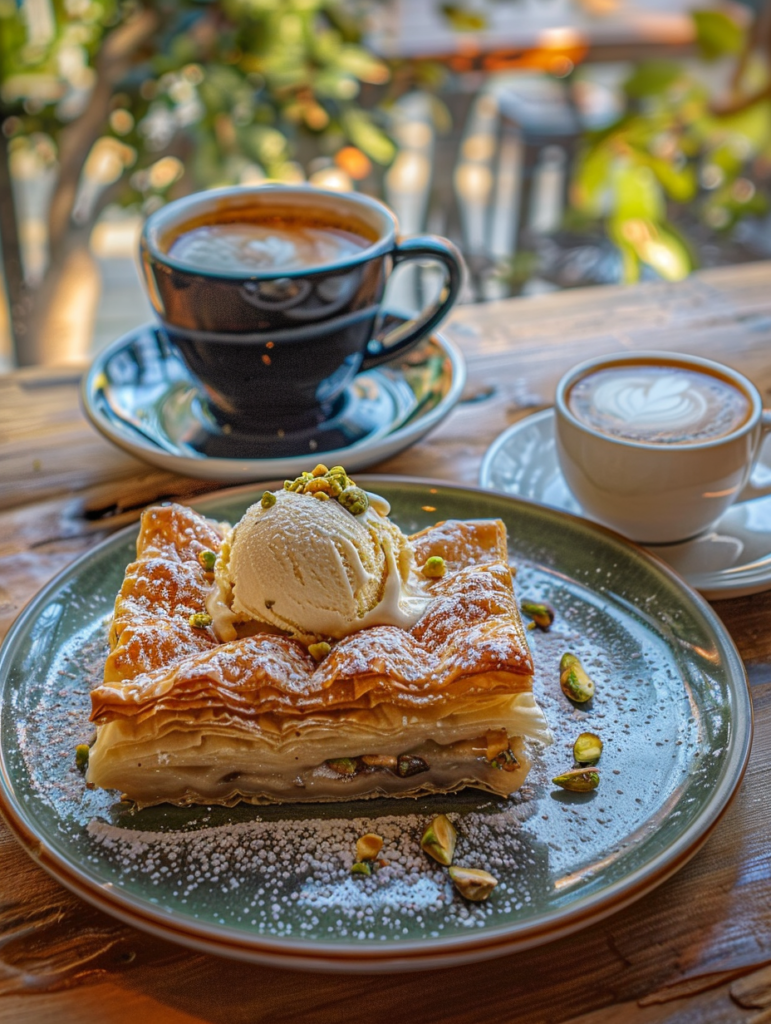
baklava bread pudding with pistachio ice cream and coffee
Elegant dessert pairing for baklava bread pudding

When it comes to reheating Baklava Bread Pudding, your goal is to warm the inside while keeping the top from going soggy. Here are the best methods:

1. Oven (Best Method)

  • Preheat to 300°F (150°C).
  • Place a slice on a baking tray and cover with foil.
  • Heat for 10–15 minutes. Remove foil in the last few minutes for a crisp top.
  • Drizzle syrup or add topping after reheating.

2. Toaster Oven

  • Perfect for single servings.
  • Reheat uncovered for 8–10 minutes.

3. Microwave (Not Ideal but Quick)

  • Use only if you’re short on time.
  • Heat in 30-second bursts at 50% power.
  • Place a damp paper towel over it to prevent drying out—but note the top may lose crunch.

Pro Tip: Serve it warm with a scoop of ice cream or fresh whipped cream to make the leftovers feel brand new.

Short on time but still want something amazing? Check out our No Bake Salted Caramel Cheesecake Cups — ready in minutes and always a crowd-pleaser.

Frequently Asked Questions (FAQ)

What chocolate is best for molten lava cake?

For molten lava cake, the best chocolate is dark chocolate with 60–70% cocoa content. This level of cocoa ensures a rich, bittersweet flavor and a perfectly gooey, molten center. Avoid using chocolate chips, which contain stabilizers that prevent smooth melting. For an extra punch, some bakers add a touch of espresso powder to enhance the chocolate’s depth.

What is the difference between molten cake and lava cake?

Though often used interchangeably, there’s a technical distinction. Lava cake has a liquid center that flows when cut—this is achieved by precise timing. Molten cake, on the other hand, may just be very soft throughout, not necessarily with a flowing core. Lava cake is engineered for contrast; molten cake may simply be underbaked or softer in texture.
In contrast, Baklava Bread Pudding focuses on layers of texture—from creamy custard interiors to crisp phyllo or nut toppings.

What temperature do you bake chocolate lava cakes?

Chocolate lava cakes are best baked at 425°F (220°C) for 12–14 minutes. This high temperature sets the outer cake quickly while keeping the center molten. Timing is crucial—bake too long and you lose the lava; too short and it turns soupy or unstable.

Is chocolate lava cake just undercooked cake?

No. A true lava cake is not just undercooked—it’s carefully constructed to have a molten core while being safely baked. The batter is intentionally formulated and baked in such a way that the center remains liquid, not raw. It’s a precision dessert, unlike traditional cakes where underbaking is a mistake.

Conclusion: Time to Bake Your Own Baklava Bread Pudding

There’s something magical about Baklava Bread Pudding. It brings together the warmth and nostalgia of bread pudding with the exotic, nutty elegance of baklava. With its crisp golden topping, aromatic syrup, and soft, spiced custard, this dessert is more than just a treat—it’s an experience.

Whether you’re prepping for a holiday table, elevating a brunch spread, or simply craving something spectacular, baklava bread pudding is your go-to recipe. It’s flexible, easy to customize, and crowd-pleasing every time.

So why not give it a try? From flavor variations to smart storage hacks, now you’ve got everything you need to own this dessert.

For more recipes, visit our facebook page

Easy Pistachio Tiramisu – The Ultimate No-Bake Dessert You’ll Love

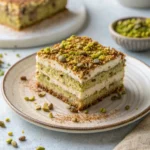
Close-up of easy pistachio tiramisu with visible layers

Introduction to Easy Pistachio Tiramisu

What is Pistachio Tiramisu?

Easy Pistachio tiramisu is a twist on the iconic Italian dessert, swapping traditional coffee-soaked layers and cocoa for pistachio-flavored cream and a nutty richness. Instead of just coffee and cocoa, it features a light green pistachio mascarpone cream that adds both color and flavor to each bite. Ladyfingers still serve as the base, offering that classic tiramisu texture—but with a whole new taste experience.

This dessert still maintains the hallmark traits of tiramisu: layered, creamy, light yet decadent—but infuses it with an earthy sweetness that only pistachios can deliver.

Print
clock clock iconcutlery cutlery iconflag flag iconfolder folder iconinstagram instagram iconpinterest pinterest iconfacebook facebook iconprint print iconsquares squares iconheart heart iconheart solid heart solid icon
Close-up of easy pistachio tiramisu with visible layers

Easy Pistachio Tiramisu – The Ultimate No-Bake Dessert You’ll Love


5 Stars 4 Stars 3 Stars 2 Stars 1 Star

No reviews

  • Author: Amellia
  • Total Time: 8 hours 25 minutes
  • Yield: 9

Description

Craving something creamy, nutty, and no-bake? Try this Easy Pistachio Tiramisu recipe that’s perfect for parties or cozy nights in


Ingredients

Mascarpone, pistachio cream, heavy cream, powdered sugar, vanilla, ladyfingers, espresso or milk


Instructions

Mix pistachio cream with mascarpone and whipped cream. Layer with soaked ladyfingers. Chill overnight. Top with pistachios.

Notes

Use homemade pistachio cream for pure flavor. Try almond milk if skipping coffee.

  • Prep Time: 25 minutes
  • Cook Time: 8 hours
  • Category: Dessert
  • Cuisine: Italian Twist

Why This Version Is So Easy and Beginner-Friendly

What makes this pistachio tiramisu easy is the no-cook, no-bake method. With just a handful of ingredients—many of which are pantry staples—you can whip up this dessert in under 30 minutes. Most of the magic happens during the chill time in your fridge, where the layers meld together into a perfectly sliceable delight.

Here’s what you won’t need:

  • No eggs
  • No baking
  • No stovetop cooking

Instead, you’ll combine pre-made ladyfingers with whipped pistachio mascarpone cream and let the fridge do the rest.

This makes it perfect for:

  • Beginner bakers
  • Busy hosts
  • Last-minute party planners

Why You’ll Love This Pistachio Tiramisu Recipe

Quick Prep, No-Bake, and Minimal Ingredients

If you’re all about getting maximum flavor with minimum effort, this easy pistachio tiramisu is your dream dessert. It takes less than 30 minutes to assemble, doesn’t require turning on your oven, and relies on just a few quality ingredients. You don’t need a culinary degree—just a mixing bowl, a spatula, and a craving for something creamy and nutty.

Love effortless desserts? Don’t miss our No Bake Salted Caramel Cheesecake Cups — creamy, quick, and perfect for every occasion.

Here’s why this recipe is perfect for everyday cravings and special occasions alike:

  • No baking required – Ideal for hot days or small kitchens
  • Make-ahead friendly – Flavors develop better overnight
  • Beginner-approved – Simple steps and no fancy equipment
  • Elevated taste – Feels gourmet, but it’s stress-free

The Unique Nutty Flavor of Pistachio in Dessert

Unlike traditional tiramisu, which leans heavily on coffee and cocoa, pistachio tiramisu introduces a warm, nutty complexity that makes each bite unique. Pistachio pairs perfectly with mascarpone’s creaminess, creating a mellow and balanced flavor profile. It’s not overly sweet—just smooth, rich, and subtly earthy.

Whether you use homemade pistachio cream or opt for a high-quality store-bought jar, the flavor shines. The nutty base combined with the airy mascarpone mixture brings something unexpectedly refreshing to a typically decadent dessert.

Ingredients Breakdown for Pistachio Tiramisu

Choosing the Best Pistachio Cream: Homemade vs Store-Bought

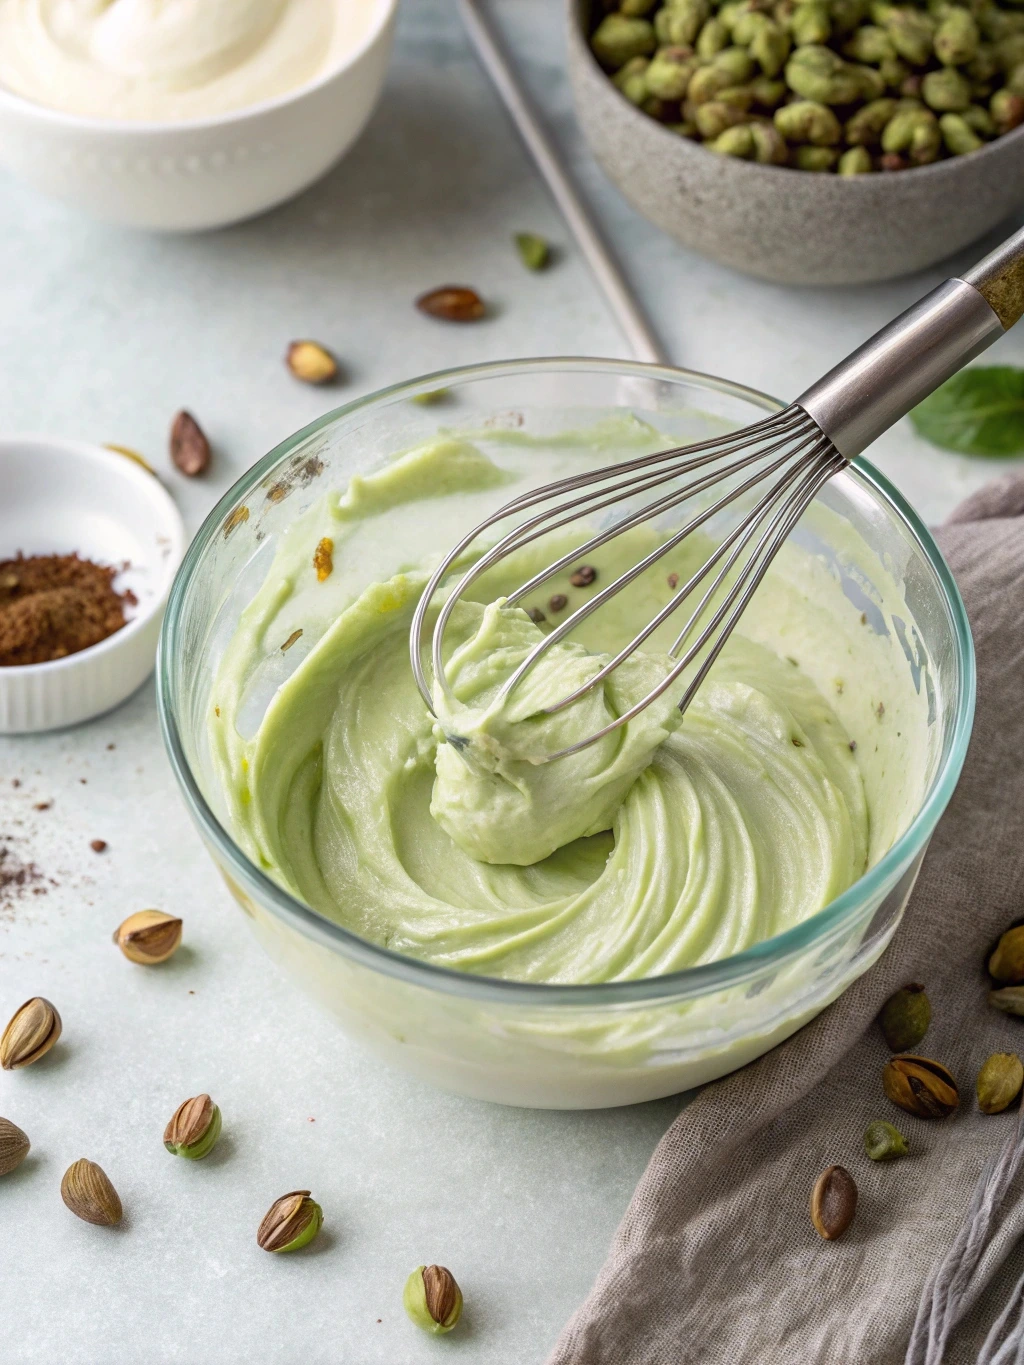
Whipping pistachio mascarpone cream in a bowl

A key ingredient in easy pistachio tiramisu is, of course, pistachio cream. This smooth, nutty spread brings richness, sweetness, and that unmistakable green hue to the dessert. But should you go homemade or grab a jar off the shelf?

Let’s break down both options:

OptionProsCons
Homemade Pistachio CreamFresh, customizable sweetness, no preservativesTakes more time and effort, needs a food processor
Store-Bought Pistachio SpreadConvenient, shelf-stable, often richer in flavorCan be pricey, varies in quality and sweetness

If you want to control the sugar and get a purer pistachio flavor, making your own is worth it. A simple blend of pistachios, sugar, a bit of milk or cream, and a dash of vanilla can create magic. But if you’re in a rush, go for a high-quality Italian pistachio spread. Look for options with a high nut percentage and minimal added oils or flavorings.

Mascarpone vs Cream Cheese: What’s Best for Texture and Taste?

Another essential choice in this recipe is the creamy base. Traditional tiramisu calls for mascarpone, but some people consider using cream cheese as a substitute—especially when mascarpone is hard to find.

Let’s compare:

IngredientTextureTasteBest Use
MascarponeLight, silky, spreadableMild, creamy, slightly sweetAuthentic tiramisu flavor and texture
Cream CheeseThicker, more tangySlightly sour, denseBudget-friendly alternative, less delicate

Mascarpone gives your pistachio tiramisu that signature smooth, melt-in-the-mouth feel. It also pairs better with the delicate flavor of pistachio. However, if you’re in a pinch, you can soften cream cheese with a splash of heavy cream to mimic mascarpone’s texture.

How to Make Easy Pistachio Tiramisu Step-by-Step

Preparing the Pistachio Mascarpone Cream

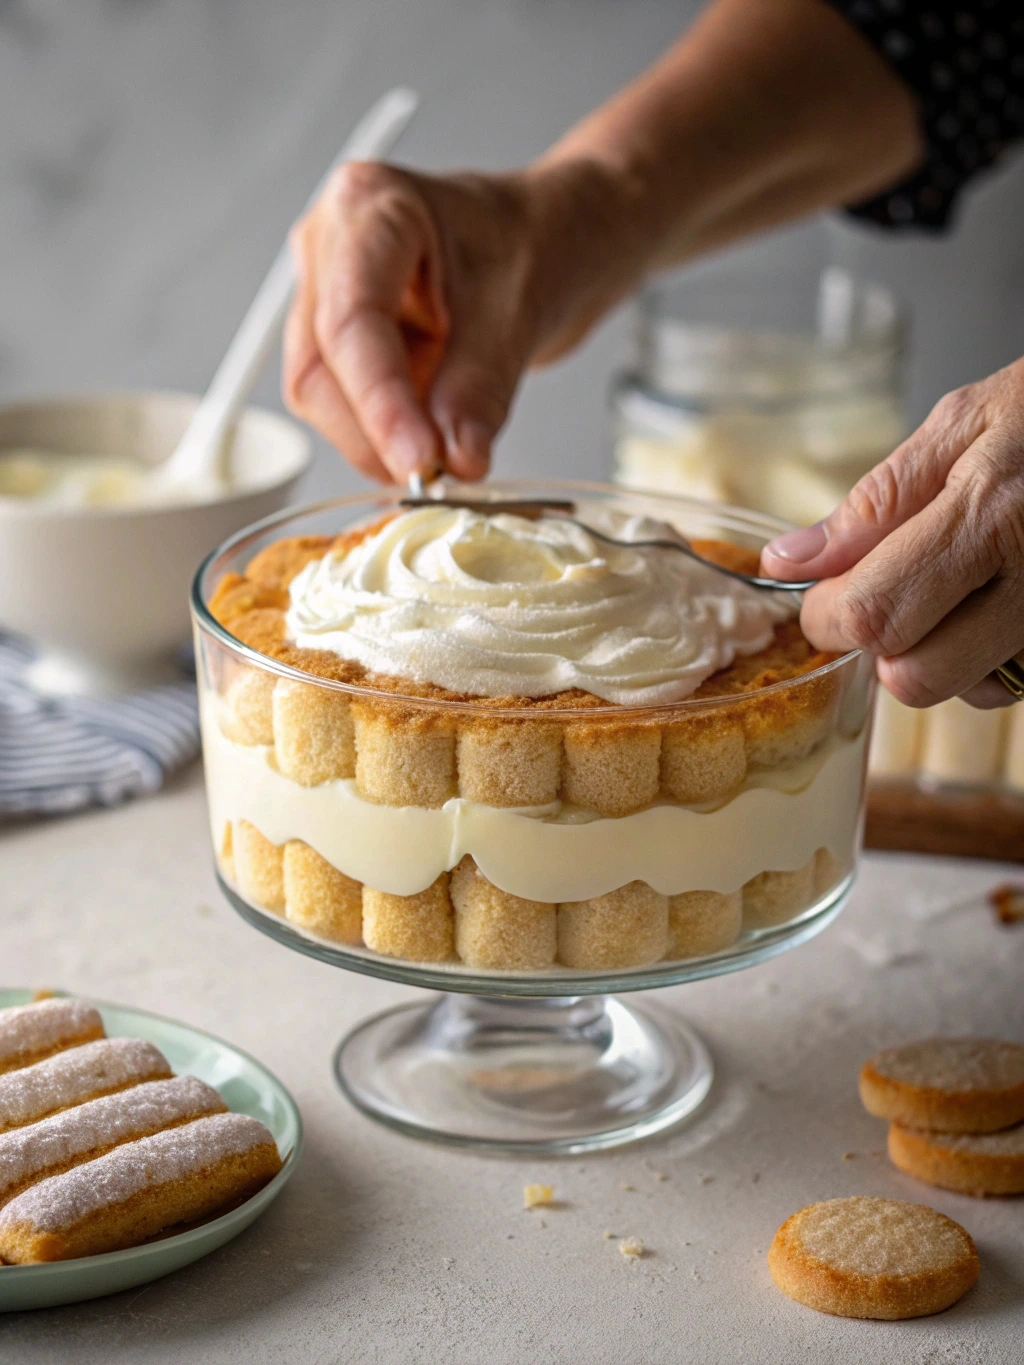
Layering ladyfingers and pistachio cream for tiramisu

The heart of any tiramisu is its cream, and in this case, the pistachio mascarpone layer is where all the magic happens. This mixture should be light, creamy, and flavorful without being too dense or too sweet.

Ingredients you’ll need:

  • 1 cup mascarpone cheese (or softened cream cheese as a substitute)
  • 3/4 cup pistachio cream (homemade or high-quality store-bought)
  • 1/2 cup powdered sugar
  • 1 cup heavy cream, cold
  • 1 tsp vanilla extract (optional)

Step-by-step instructions:

  1. In a mixing bowl, beat the mascarpone and pistachio cream together until fully combined and smooth.
  2. In a separate bowl, whip the heavy cream and powdered sugar until stiff peaks form.
  3. Gently fold the whipped cream into the pistachio mascarpone mix. Add vanilla extract if using.
  4. Chill in the fridge for 10–15 minutes before layering.

Pro Tip: If your cream feels grainy, it could be overmixed or the pistachio paste wasn’t smooth enough. For best results, blend your pistachio cream until silky before mixing.

Dipping Ladyfingers and Layering Tips

Classic tiramisu uses espresso-soaked ladyfingers, but you can switch it up depending on your taste preferences. Pistachio pairs beautifully with coffee, but also shines with milk or pistachio liqueur if you’re avoiding caffeine.

Soaking liquid options:

  • Traditional espresso (cooled)
  • Sweetened pistachio milk
  • Almond milk with vanilla
  • Lightly sweetened coffee substitute

Layering process:

  1. Quickly dip each ladyfinger into your chosen liquid (no more than 2 seconds).
  2. Line the bottom of your serving dish with the soaked ladyfingers.
  3. Add a thick layer of pistachio mascarpone cream.
  4. Repeat with another layer of soaked ladyfingers and cream.
  5. Finish with a generous dusting of crushed pistachios or white chocolate shavings.

Bonus Tip: For a cleaner slice, refrigerate the tiramisu overnight. It allows the cream to firm up and flavors to intensify.

Common Mistakes and How to Fix Them

Why Your Pistachio Cream Turns Grainy

One of the most common issues people face when making easy pistachio tiramisu is ending up with a grainy or lumpy mascarpone-pistachio mixture. It’s frustrating, especially when you’re aiming for a smooth and creamy texture.

Here’s why it happens—and how to fix it:

CauseSolution
Low-quality pistachio paste with bits of nutsUse a high-speed blender or food processor to smooth it before mixing
Over-whipping mascarponeMix mascarpone just until combined—never overmix
Cold ingredients clumping togetherLet ingredients come to room temperature before blending
Sugar not fully dissolvedUse powdered sugar, not granulated, to ensure smooth texture

If you’re using homemade pistachio cream, strain it through a fine mesh sieve to catch any grainy bits. Always blend it well before incorporating it into your mascarpone base.

Fixing Runny or Overly Thick Mascarpone Layers

Your cream layer should be stable enough to hold its shape, but not so thick it feels dense. The two most common problems: it’s either too runny or too stiff.

Runny mascarpone mixture?
This often happens if:

  • You’ve overmixed and broken the whipped cream
  • The mascarpone was too warm
  • You added liquid flavorings (like liqueurs) too early

Fix it by:

  • Folding in additional whipped cream to bring back structure
  • Chilling the cream in the fridge for 30 minutes before layering

Too thick or dense?
If your cream is heavy and hard to spread:

  • Add 1–2 tbsp of cold heavy cream and gently fold to loosen it up

Customizing Your Pistachio Tiramisu

Skipping Coffee: What Are the Best Alternatives?

Traditional tiramisu soaks ladyfingers in espresso, but coffee isn’t for everyone—whether for flavor, dietary, or caffeine reasons. The good news? This easy pistachio tiramisu is super versatile and still delicious without coffee.

Here are the best liquid substitutes for soaking your ladyfingers:

AlternativeFlavor ProfileIdeal For
Sweetened pistachio milkNutty, light, and creamyPistachio lovers, kids
Vanilla almond milkMild and sweetCoffee-free diets
White chocolate liqueurSweet, rich, and indulgentAdults-only versions
Simple sugar syrup with vanillaNeutral and versatileAll ages and palettes
Amaretto (almond liqueur)Sweet, nutty, and deepFlavor boost with minimal effort

If you want a more dessert-like feel, try combining pistachio milk with a splash of vanilla extract. It keeps the dish cohesive and complements the pistachio mascarpone beautifully.

Making It Alcohol-Free or Gluten-Free

Want to make your pistachio tiramisu more accessible? It’s easier than you think to modify it for dietary needs without sacrificing flavor.

Alcohol-Free Tips:

  • Stick to milk-based soaks like almond, oat, or coconut milk
  • Use vanilla or orange extract for aroma and depth
  • Avoid liqueur-based pistachio spreads

Gluten-Free Swaps:

  • Replace traditional ladyfingers with gluten-free sponge cake or gluten-free ladyfingers (available at many health stores)
  • Double-check your pistachio cream and mascarpone for hidden gluten ingredients

Bonus: Many store-bought pistachio creams are already gluten-free and alcohol-free, making this an easy recipe to adapt.

If you enjoy globally inspired desserts, try our Baklava Bread Pudding — a rich blend of Middle Eastern and European flavors with a crunchy, creamy twist.

Make-Ahead & Storage Tips

How Long in Advance Can You Prepare It?

One of the biggest perks of easy pistachio tiramisu is that it actually gets better as it sits. This dessert is made for the fridge. The layers meld together, the ladyfingers soften perfectly, and the pistachio flavor intensifies.

Best Make-Ahead Window:
Prepare the tiramisu at least 6 hours ahead, but overnight (8–24 hours) is ideal. This allows the cream to set firmly, making it easier to slice and serve.

Make-Ahead Timeline:

TimeframeResult
1–2 hoursToo soft; cream may be unstable
4–6 hoursAcceptable for casual meals
8–24 hoursIdeal texture and flavor
2–3 daysStill great; best flavor and structure

If you’re prepping for a party or holiday, this dessert is a lifesaver—freeing up time on the day of your event.

Best Ways to Store and Serve Pistachio Tiramisu

Proper storage is key to keeping your tiramisu fresh and delicious. Here’s how to do it right:

Storage Tips:

  • Always refrigerate the tiramisu, covered tightly with plastic wrap or a lid
  • Keep it on the bottom shelf, where the temperature is most consistent
  • Consume within 3–4 days for optimal taste and safety

Serving Tips:

  • Slice with a clean, sharp knife for neat layers
  • Wipe the blade between cuts for a clean presentation
  • Top with crushed pistachios, shaved white chocolate, or a dusting of matcha powder for color and texture

Freezing?
Technically, you can freeze tiramisu. Wrap it tightly and store for up to 2 weeks. Thaw overnight in the fridge. However, freezing may slightly change the texture of the cream layer.

Serving and Presentation Ideas

Garnishing Tips with Crushed Pistachios and White Chocolate

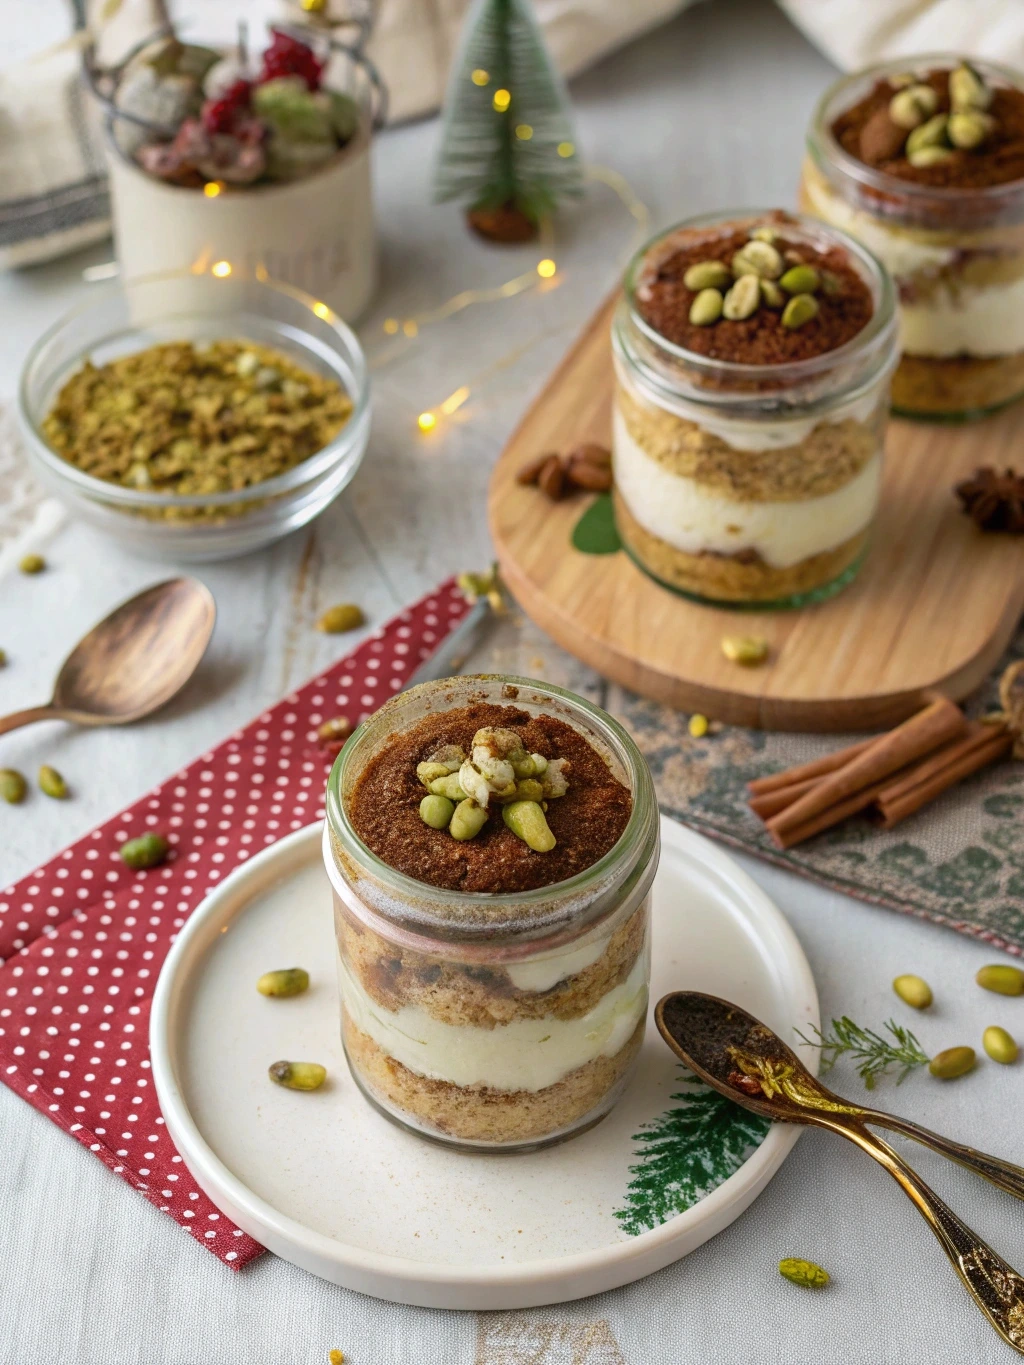
Mini pistachio tiramisu servings in glass jars

When it comes to elevating the look of your easy pistachio tiramisu, a few thoughtful garnishes go a long way. Since this dessert already boasts a lovely pale green hue from the pistachio cream, all it needs is a bit of texture and contrast to truly pop.

Top Garnishing Ideas:

  • Crushed roasted pistachios: Sprinkle them generously on top for crunch and a burst of nutty flavor
  • White chocolate curls or shavings: Adds visual appeal and a creamy sweetness
  • Edible gold leaf or rose petals: For a luxurious, party-worthy presentation
  • Matcha powder dusting: A green-on-green effect that enhances the nutty notes

Layering the cream cleanly and topping it artistically can turn your homemade dessert into something restaurant-worthy.

For a sweet companion to your main course, pair it with Tandoori Chicken Naan Buns — a savory fusion delight that’s bold, spiced, and utterly satisfying.

How to Serve It for Parties and Holidays

Whether you’re planning a dinner party, baby shower, holiday brunch, or birthday bash, pistachio tiramisu fits right in. It’s light, elegant, and crowd-pleasing—and it scales well for groups.

Serving Options:

  • In a glass dish: Ideal for family-style or buffet serving
  • In individual cups or jars: Perfect for grab-and-go at parties or elegant plated desserts
  • As a cake-style slice: Great for layered effect and portion control

Presentation Tips:

  • Chill well before slicing to maintain clean layers
  • Use a metal spatula for lifting neat squares
  • Garnish just before serving to keep toppings crisp

Nutrition and Dietary Notes

Calorie Count and Nutritional Breakdown

Although easy pistachio tiramisu feels light and airy, it’s still a rich, indulgent dessert. Understanding what’s inside each slice helps if you’re keeping an eye on calories or macronutrients.

Here’s a basic nutritional estimate for one square serving (based on a standard 9×9-inch dish, serving 9 pieces):

NutrientAmount per Serving
Calories330–400 kcal
Total Fat28g
Saturated Fat16g
Carbohydrates20g
Sugar14g
Protein5g

Note: The values vary depending on whether you use mascarpone vs. cream cheese, store-bought vs. homemade pistachio cream, and any added liqueurs or sweeteners.

How to Make It Healthier Without Compromising Taste

Want a lighter version of this pistachio tiramisu without sacrificing the creamy joy? You can reduce calories and fat with a few simple swaps while still enjoying all that nutty flavor.

Smart Substitutions:

  • Use light mascarpone or a blend of Greek yogurt and whipped cream
  • Try homemade pistachio cream with less added sugar
  • Replace ladyfingers with whole grain sponge cake
  • Use unsweetened almond milk as the soaking liquid
  • Swap powdered sugar for a sugar substitute like stevia or monk fruit

Portion control also makes a difference—serve in small jars or ramekins for an elegant touch with built-in limits.

Frequently Asked Questions (FAQs)

Can I use homemade pistachio cream?

Yes, absolutely! Homemade pistachio cream is a fantastic option, especially if you want to control the sweetness and get a purer nut flavor. It’s easy to make by blending roasted pistachios with sugar, milk, and a touch of vanilla. Just make sure it’s blended until completely smooth to avoid a grainy texture in your tiramisu cream layer.

Can I use cream cheese instead of mascarpone cheese?

You can! While mascarpone offers that classic, velvety tiramisu texture, cream cheese is a decent substitute, especially in the U.S. where it’s easier to find. To mimic mascarpone’s softness, let the cream cheese come to room temperature and beat it with a little heavy cream until smooth and spreadable. Just note that the flavor will be slightly tangier than with mascarpone.

Why is my pistachio mascarpone mixture grainy?

A grainy mascarpone-pistachio mixture is usually caused by poor blending, cold ingredients, or low-quality pistachio paste. To avoid this:
Use powdered sugar instead of granulated
Let all dairy ingredients come to room temp before mixing
Blend pistachio cream until ultra-smooth before combining with mascarpone
If needed, pass the final cream through a fine mesh strainer before layering.

Can I skip the coffee?

Definitely. If you don’t like coffee or want a kid-friendly option, you can use pistachio milk, almond milk, or even a vanilla syrup soak for your ladyfingers. This easy pistachio tiramisu is incredibly flexible, and it still delivers amazing flavor without espresso.

Can I prepare this tiramisu ahead of time?

Yes, and it’s actually better when made ahead. Tiramisu benefits from chilling overnight, which allows the flavors to develop and the cream to firm up. You can make it up to 2–3 days in advance, just keep it tightly covered in the fridge. Garnish just before serving for the best texture and presentation.

Conclusion

There you have it—Easy Pistachio Tiramisu, your new go-to no-bake dessert for any season, any event, or just because. Whether you’re making it for the first time or experimenting with new flavors like homemade pistachio cream or a coffee-free twist, this recipe delivers elegance without the stress.

From its rich, nutty flavor to its soft, creamy layers, this dessert is a guaranteed crowd-pleaser. Plus, it’s versatile, customizable, and beginner-friendly. Make it ahead, dress it up, or keep it simple—it never fails to impress.