Perfect Chocolate Lava Cakes – A Rich and Gooey Delight

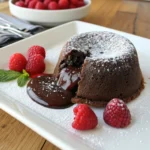
Perfect Chocolate Lava Cake with molten center and berry garnish

Introduction

Few desserts capture hearts quite like Perfect Chocolate Lava Cakes. With their crisp, delicate exterior and a molten, gooey chocolate center that flows out like liquid gold, they’re nothing short of magical. This indulgent treat may seem fancy, but it’s surprisingly simple to make with just a handful of ingredients.

Hi, I’m Amellia, the creator of 89Recipes.com, where I share approachable, tested recipes for everyday cooks. Whether you’re a busy professional or just starting out in the kitchen, I believe everyone deserves delicious, homemade food without the stress. Perfect Chocolate Lava Cakes embody that very spirit quick, comforting, and guaranteed to impress.

In this guide, I’ll walk you through everything you need to know to master this elegant dessert. You’ll discover the secrets behind the gooey center, tips from expert chefs, creative variations, and even how to prep them ahead of time. Stick around and let’s turn your kitchen into a five-star bakery.

Print
clock clock iconcutlery cutlery iconflag flag iconfolder folder iconinstagram instagram iconpinterest pinterest iconfacebook facebook iconprint print iconsquares squares iconheart heart iconheart solid heart solid icon
Perfect Chocolate Lava Cake with molten center and berry garnish

Perfect Chocolate Lava Cakes – A Rich and Gooey Delight


5 Stars 4 Stars 3 Stars 2 Stars 1 Star

No reviews

  • Author: Amellia
  • Total Time: 23 minutes

Description

Perfect Chocolate Lava Cakes are easier than you think. Just 6 ingredients and 13 minutes to heaven!


Ingredients

Scale
  • 1/2 cup unsalted butter

  • 4 oz dark chocolate (60–70%)

  • 2 eggs + 2 yolks

  • 1/4 cup granulated sugar

  • 1/4 cup all-purpose flour

  • Pinch of salt


Instructions

  • Preheat oven to 425°F. Grease 4 ramekins.

  • Melt chocolate and butter. Whisk eggs and sugar until thick.

  • Combine wet ingredients, fold in flour and salt.

  • Fill ramekins ¾ full. Bake for 11–13 minutes.


  • Let rest 1 minute, then invert and serve

  • Prep Time: 10 minutes
  • Cook Time: 13 minutes

Understanding the Allure of Perfect Chocolate Lava Cakes

What Makes a Lava Cake “Perfect”?

When we talk about the perfect lava cake, we’re talking about balance. A rich, slightly crisp outer shell that gives way to a warm, flowing chocolate center—this contrast in texture and temperature is what elevates it from just another dessert to an experience. Precision in baking time is key here. Just a minute too long in the oven, and the molten center becomes cake-like. Not enough time, and you risk a collapsed mess. But when done right? Pure joy.

Why Chocolate Lovers Crave This Dessert

Chocolate lava cakes aren’t just delicious—they’re sensational. The deep, bittersweet flavor of premium chocolate combines with the buttery softness of the sponge to create a complex mouthfeel. Add to that the element of surprise as the first spoon breaks through the surface, and it’s easy to see why this dessert is a favorite at restaurants and dinner parties alike. It’s drama and decadence in one compact, irresistible cake.

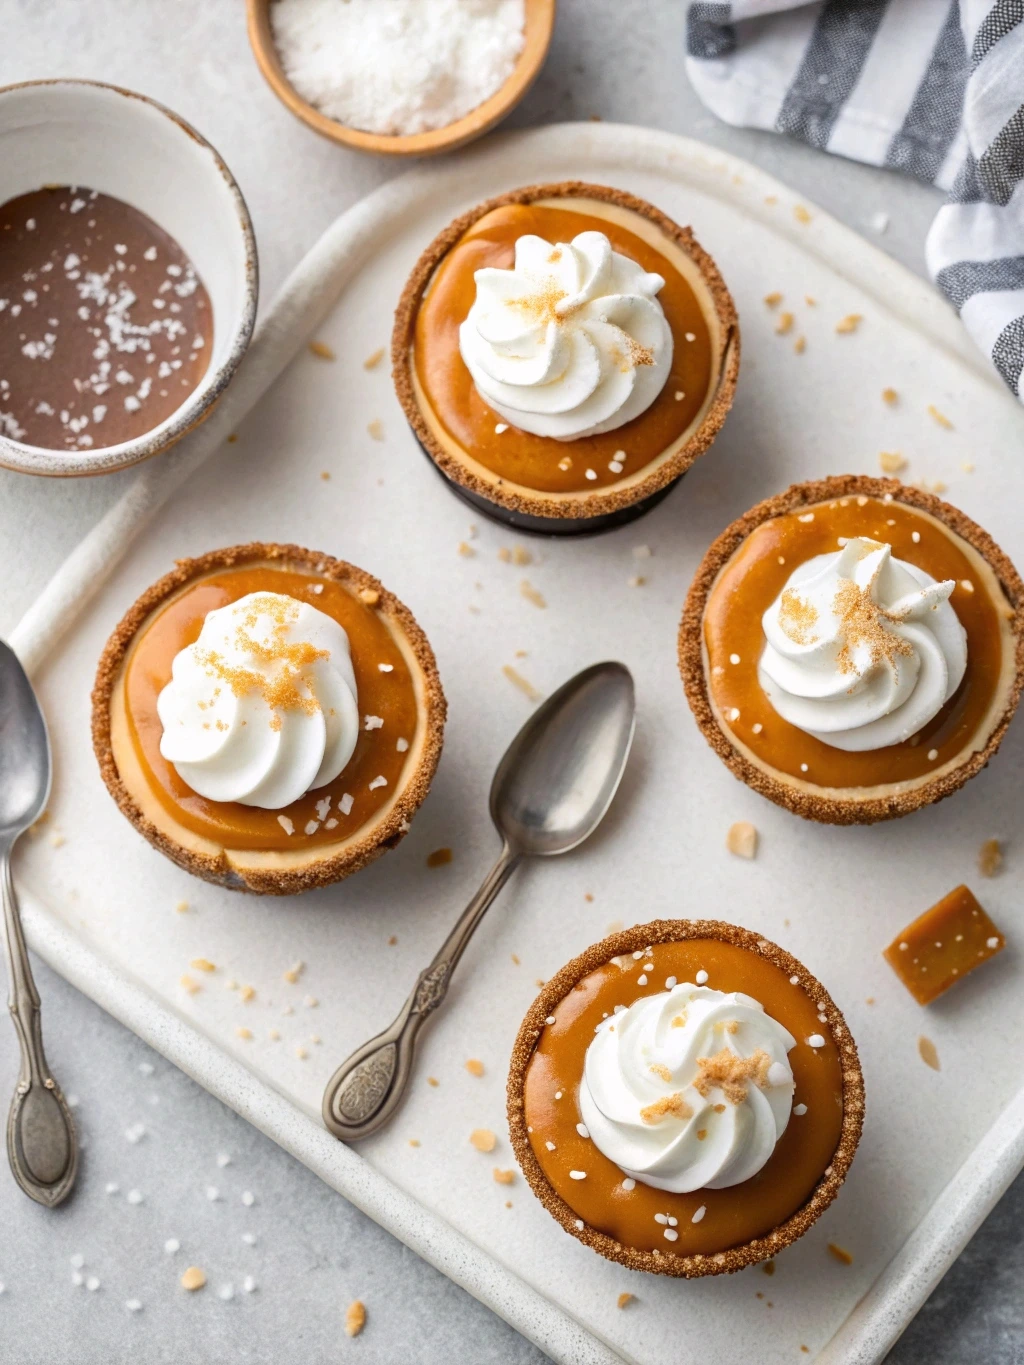
If you’re a fan of gooey, indulgent desserts, you’ll love our No Bake Salted Caramel Cheesecake Cups — sweet, creamy, and ridiculously easy to make.

How to Make Perfect Chocolate Lava Cakes at Home

Essential Ingredients and Tools Needed
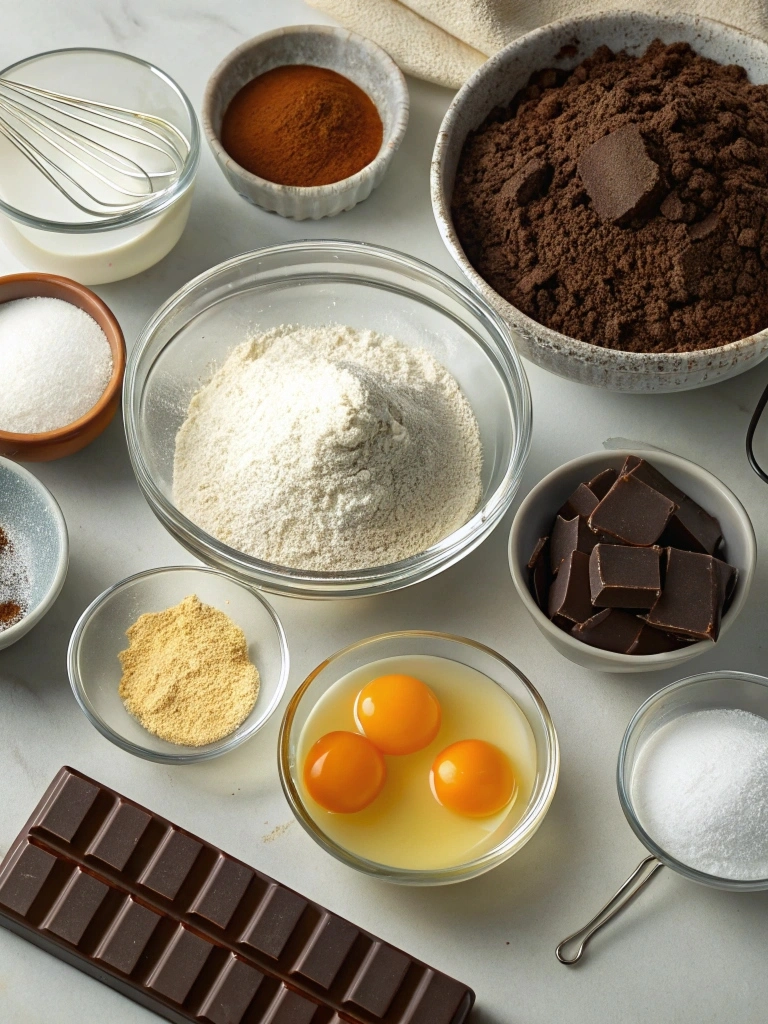
Chocolate lava cake ingredients preparation

Before diving into baking, it’s important to gather everything you’ll need. Luckily, one of the best things about chocolate lava cakes is their simplicity. These indulgent treats require only a handful of pantry staples—nothing fancy, just quality ingredients that shine when used right.

Here’s a basic list to get you started:

IngredientWhy It Matters
Dark Chocolate (60–70%)Delivers a deep, rich flavor and gooey texture
Unsalted ButterAdds moisture and creates that molten center
Eggs + YolksProvide structure and that custard-like texture
Granulated SugarSweetens and enhances chocolate’s richness
All-Purpose FlourJust enough to hold the cake’s form
Salt (a pinch)Balances sweetness and boosts flavor
Optional: Vanilla, Espresso PowderIntensify and deepen chocolate notes

Tools You’ll Need:

  • Ramekins or muffin tins (greased well)
  • Mixing bowls
  • Hand or stand mixer
  • Whisk and spatula
  • Baking sheet
  • Oven thermometer (to check accuracy)

If you don’t have ramekins, don’t stress. You can also use heat-safe mugs or a well-greased muffin tin. Just be sure to adjust the bake time slightly.

Step-by-Step Guide to Making Lava Cakes

Now let’s get into the fun part—baking your perfect chocolate lava cakes. This recipe yields 4 individual cakes and comes together in under 30 minutes. Ready?

  1. Prep Your Ramekins
    Generously butter the ramekins and dust with cocoa powder. This prevents sticking and adds more chocolate flavor.
  2. Melt Chocolate and Butter
    In a microwave-safe bowl, combine chopped chocolate and butter. Heat in 20-second intervals, stirring between each, until smooth and glossy.
  3. Beat Eggs and Sugar
    In another bowl, whisk the eggs, yolks, and sugar until pale and thick—about 2–3 minutes. This traps air and creates a fluffy texture.
  4. Combine Wet and Dry Ingredients
    Gently fold the chocolate-butter mixture into the egg-sugar mix. Sift in the flour and a pinch of salt, then stir just until combined. Don’t overmix.
  5. Fill and Bake
    Divide the batter evenly among the ramekins, filling them about ¾ of the way. Bake in a preheated oven at 425°F (220°C) for 11–13 minutes. The edges should be firm, but the centers should jiggle slightly when shaken.
  6. Let Rest, Then Serve
    Remove from oven and let rest for 1 minute. Carefully invert each cake onto a plate. Serve warm with a dusting of powdered sugar or a scoop of vanilla ice cream.

The Secret to Chocolate Lava Cakes’ Perfect Center

Controlling Bake Time and Temperature

Ask any expert and they’ll agree: the heart of a perfect chocolate lava cake is all about timing. The key to achieving that signature molten center lies in baking precision. Overbake it, and you’ve got a brownie. Undercook it, and you’ll end up with a chocolate puddle. Here’s how to nail it every time.

Optimal Baking Conditions:

  • Temperature: Preheat your oven to 425°F (220°C). Make sure it’s accurate—use an oven thermometer if needed.
  • Bake Time: Bake the cakes for 11 to 13 minutes. The edges should look set and firm. The center should still be soft and slightly jiggly.

Remember, ovens vary. If yours runs hot, you may need to reduce the time slightly. If you’re baking in smaller ramekins or muffin tins, start checking at the 10-minute mark.

Quick Tip: Chill your batter-filled ramekins in the fridge for 30 minutes before baking. This gives the outside a head start, helping preserve the gooey center.

Craving something unique and layered? Try our Baklava Bread Pudding — a luxurious fusion of creamy custard and crunchy baklava.

Choosing the Right Chocolate for Maximum Melt

Chocolate is the soul of lava cakes. Using the right type not only affects taste—it impacts texture, richness, and the lava effect.

Chocolate TypeResult in Lava Cake
Bittersweet (60–70%)Best choice. Intense, bold flavor. Rich lava.
Semi-sweetSweeter, softer profile. Still molten.
Milk ChocolateMild flavor. Softer melt. Less structure.
Chocolate ChipsAvoid. Often contain stabilizers that prevent smooth melting.

Pro Tip: Always use high-quality chocolate bars and chop them by hand. Brands like Ghirardelli, Lindt, or Valrhona melt beautifully and provide a decadent finish.

You can also add a teaspoon of espresso powder to intensify the chocolate flavor without adding coffee taste.

Exploring the Origin of Molten Chocolate Cake

Who Invented Molten Chocolate Cake?

The backstory of molten chocolate cake, also known as chocolate fondant or lava cake, is as rich as its gooey center. Two prominent chefs are often credited with its creation—but the debate over who made it first still simmers in the culinary world.

Jean-Georges Vongerichten, a celebrated French-American chef, claims he accidentally discovered the dessert in 1987. While baking individual chocolate cakes for a dinner party, he pulled them out of the oven too soon. To his surprise, diners loved the warm, flowing center, and the rest is history.

However, Michel Bras, another revered French chef, developed a similar dessert back in 1981 in Laguiole, France. His version involved a frozen chocolate ganache core baked inside cake batter, resulting in a perfectly timed lava flow. Bras’ technique was more complex but intentional, which many argue makes him the true originator.

Whichever story you believe, one thing is certain: the lava cake is a happy accident—or innovation—that’s become a dessert legend.

How It Became a Restaurant Staple Worldwide

After its American debut in the late 1980s, molten chocolate cake took off fast. By the early 1990s, it was popping up on dessert menus across upscale restaurants. Its charm? A mix of theatrical presentation and simple ingredients that felt indulgent yet approachable.

Why restaurants love it:

  • Can be made ahead and baked to order
  • Easy to scale for large crowds
  • Versatile for creative variations (think raspberry, peanut butter, or salted caramel cores)

Taste Profile of a Molten Chocolate Cake

Texture: Gooey Inside, Crisp Outside
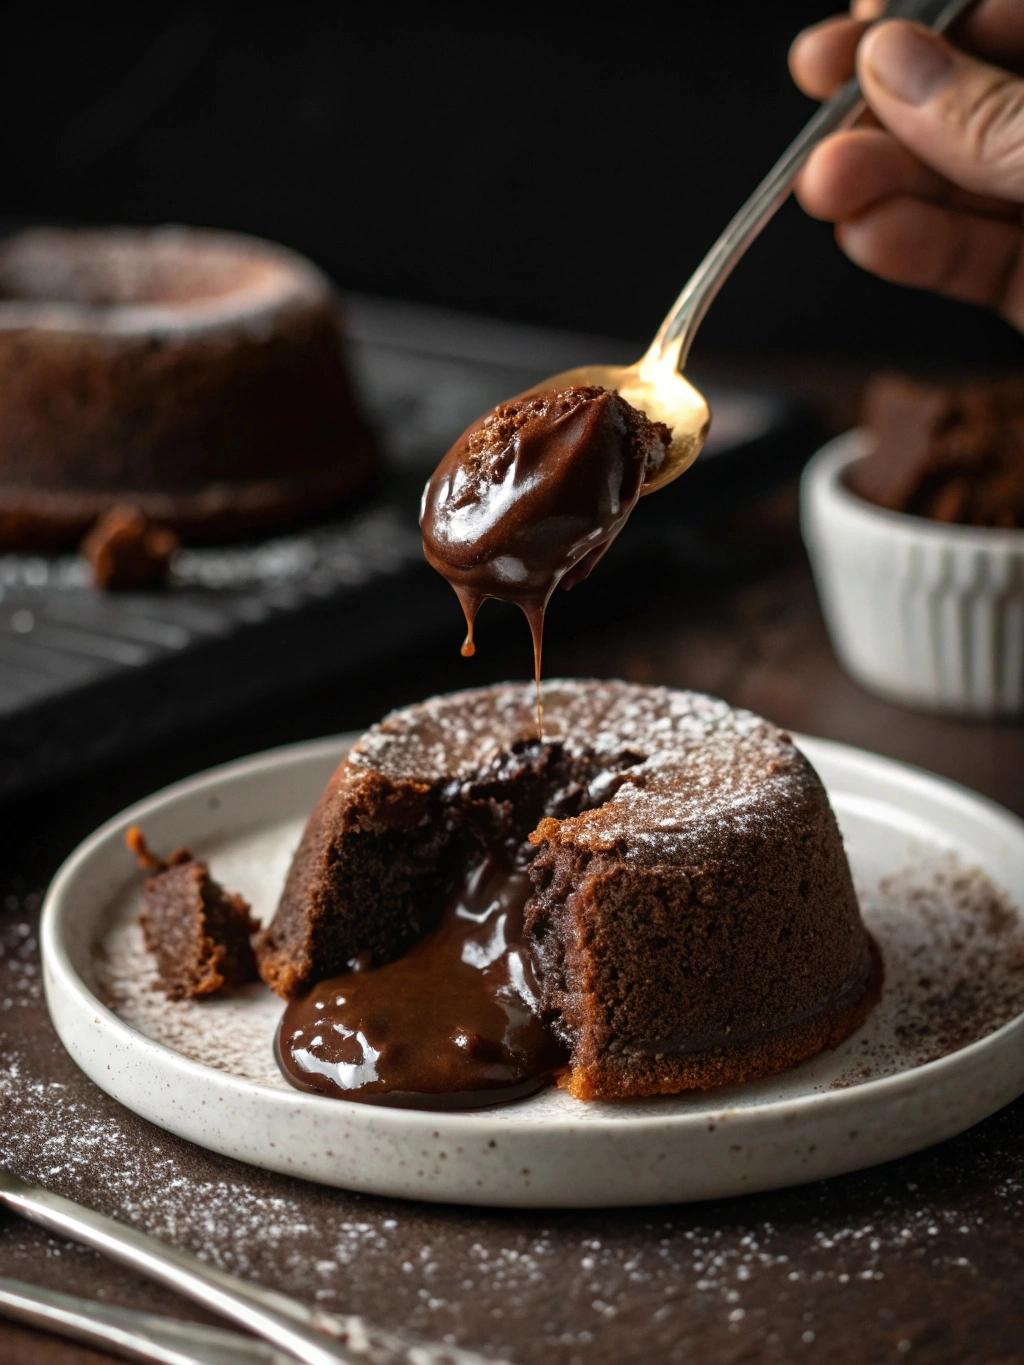
Molten center of chocolate lava cake

One of the most unforgettable qualities of a perfect chocolate lava cake is its contrast in texture. When done right, this dessert delivers a luxurious, multi-sensory experience in every bite.

The outer shell is slightly crisp, baked just enough to hold the cake together. It creates that satisfying “break” when you dig in with a spoon. Then comes the center, warm and fluid—like a rich chocolate sauce that spills beautifully onto your plate.

This yin-yang of textures keeps lava cakes exciting. It’s soft but structured, rich but balanced, elegant yet comforting.

Pro tip: The center continues to cook slightly even after being removed from the oven. That’s why resting the cake for just one minute before unmolding is crucial—it stabilizes the exterior while keeping the inside molten.

Flavor Combinations and Pairings

Flavor-wise, molten chocolate cakes are decadent, bold, and slightly bitter with deep cocoa undertones—especially if you’re using bittersweet or dark chocolate. But what really elevates this dessert are the accompaniments and customizations you pair with it.

Here are popular flavor pairings:

ComplementWhy It Works
Vanilla Ice CreamCold-meets-hot contrast, creaminess balances intensity
Fresh RaspberriesTartness cuts through the richness of chocolate
Sea Salt FlakesEnhances depth of chocolate flavor with savory contrast
Espresso DrizzleAdds a bitter edge and sharpens cocoa notes
Caramel or Peanut ButterBrings sweetness, nuttiness, or a buttery counterpoint

And don’t forget the dusting of powdered sugar, a classic finishing touch that adds light sweetness and visual appeal.

After a rich meal like our Tandoori Chicken Naan Buns, balance things out with the rich chocolate melt of our lava cakes.

Pro Tips and Baking Secrets from Top Chefs

Tips from Ree Drummond, Duff Goldman, and More

What do chefs like Ree Drummond, Duff Goldman, and Anne Burrell have in common? They’ve each shared their versions of perfect chocolate lava cakes, and while the recipes vary slightly, their secrets for success share common themes:

  1. Use room temperature eggs – Ree Drummond emphasizes this for proper emulsification and even texture.
  2. Quality chocolate is non-negotiable – Duff Goldman recommends using bar chocolate with 60–70% cacao for a rich, true flavor.
  3. Underbake strategically – Anne Burrell is known for saying, “It’s all about the timing.” She recommends watching for firm edges and a slightly sunken, jiggly center.

Each of these experts agrees: a lava cake’s texture and flavor rely on precision—not guesswork. Even small tweaks in ingredient temperature or bake time can impact results.

Mistakes to Avoid for Consistent Results

Even though they’re simple to make, lava cakes are easy to mess up if you’re not careful. Here are some of the most common pitfalls—and how to dodge them:

MistakeHow to Fix It
Overbaking the cakeStart testing at 10 minutes; center should jiggle
Using low-quality chocolateStick to bars with 60–70% cocoa solids
Forgetting to grease ramekinsUse butter + cocoa powder for easy release
Not sifting flourPrevents clumps and gives a smooth batter
Skipping rest time before unmoldingWait 1 minute before flipping out the cake

Want to add your own twist? Try adding a frozen ganache ball in the center before baking for a guaranteed gooey middle—this is Michel Bras’ original trick!

Delicious Variations of Chocolate Lava Cakes

White Chocolate, Peanut Butter, and Caramel Lava Cakes

The classic perfect chocolate lava cake is just the beginning. Once you’ve mastered the base recipe, the variations are endless—and each one brings its own indulgent twist.

Here are a few crowd favorites to try:

  1. White Chocolate Lava Cake
    Swap out dark chocolate for white chocolate to create a sweeter, vanilla-forward version. Add a raspberry or lemon center for tart contrast.
  2. Peanut Butter Lava Cake
    Spoon a teaspoon of creamy peanut butter into the center of each ramekin before baking. As the cake bakes, it melts into a warm, nutty core.
  3. Salted Caramel Lava Cake
    Drop a frozen caramel cube in the batter before baking. The caramel melts into the molten center and offers an unforgettable salty-sweet finish.
  4. Spicy Mexican Lava Cake
    Add a pinch of cinnamon and cayenne to the batter for a subtle heat that balances the richness.
  5. Mocha Lava Cake
    Stir in espresso powder and top with coffee ice cream. A must-try for coffee lovers.

Vegan and Gluten-Free Lava Cake Alternatives

Craving that molten chocolate center but need something dairy- or gluten-free? Good news—you can make lava cakes for every lifestyle without sacrificing taste or texture.

Vegan Lava Cake Tips:

  • Use a flax or chia egg as a binder.
  • Replace butter with coconut oil or vegan margarine.
  • Choose dairy-free dark chocolate and plant-based milk.

Gluten-Free Lava Cake Tips:

  • Swap all-purpose flour with almond flour or a 1:1 gluten-free blend.
  • Add a tiny bit of cornstarch to keep the structure intact.

Pro tip: Chill vegan batter for 10 minutes to improve firmness during baking.

Serving Ideas and Presentation Tips

Garnishes, Ice Cream, and Plating Like a Pro
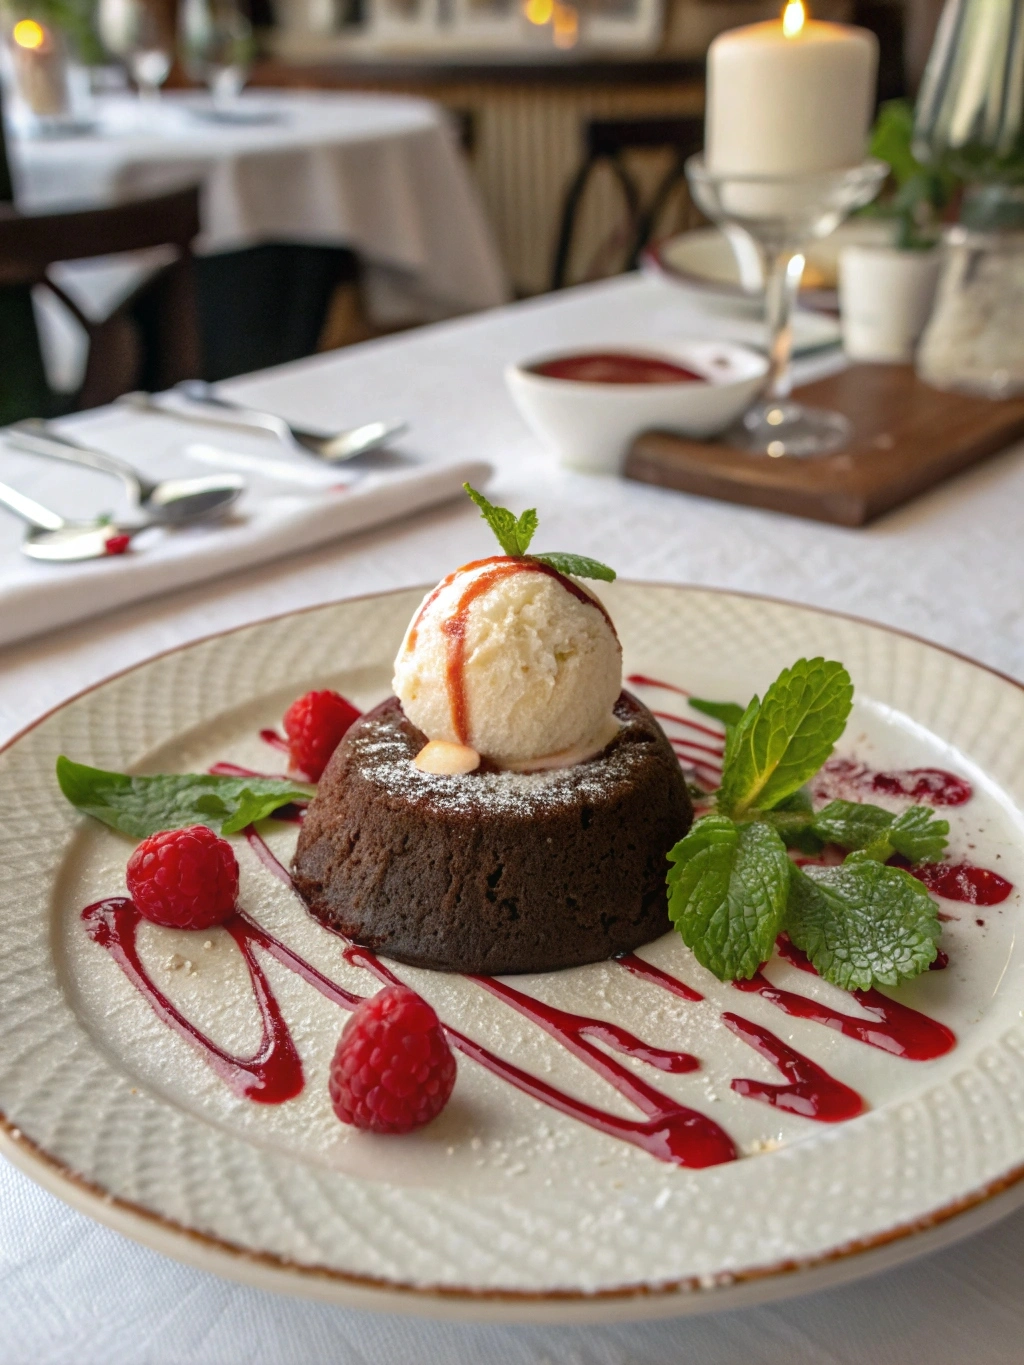
Plated chocolate lava cake with mint and ice cream

Once your perfect chocolate lava cakes are out of the oven, the final magic happens on the plate. Presentation not only makes your dessert Instagram-worthy—it enhances the dining experience. Here’s how to serve them like a chef.

Top Garnishes to Elevate Your Lava Cake:

  • Powdered Sugar: Lightly dusted for a clean, classic finish.
  • Fresh Berries: Raspberries, strawberries, or blueberries add color and a tart bite.
  • Mint Leaves: Brighten the plate and balance the richness.
  • Chocolate Shavings or Curls: A luxurious touch for chocolate lovers.
  • Edible Flowers: Ideal for romantic or spring-themed dinners.

Best Ice Cream Pairings:

FlavorWhy It Works
Vanilla BeanCreamy, neutral contrast to intense chocolate flavor
Salted CaramelAdds depth and complements the molten center
EspressoBoosts cocoa notes with roasted richness
Coconut or Almond MilkVegan-friendly, offers tropical flavor balance

Pro Plating Tips:

  • Place the cake off-center on the plate for a modern, asymmetrical look.
  • Add a smear of fruit coulis or chocolate sauce under the cake.
  • Use a ring mold or squeeze bottle for precise sauce designs.
  • Plate on a white or black dish for visual contrast.

Occasion-Based Presentation: Romantic Dinner, Family Treats

The beauty of molten chocolate lava cakes is their versatility. Whether you’re making them for a cozy family night or an elegant dinner party, how you present them sets the mood.

OccasionServing Style
Valentine’s DayHeart-shaped ramekins, rose petal garnish, berry compote
Dinner PartyIndividual plates with fresh mint, gold leaf or edible flowers
Family DessertServe in mugs with a scoop of vanilla and crushed Oreos
Kids’ TreatAdd rainbow sprinkles and mini marshmallows

Lava cakes are a canvas—feel free to get creative while keeping the core simple and gooey.

Storage, Reheating, and Make-Ahead Tips

How to Store Lava Cakes Without Losing Their Texture

Freshly baked perfect chocolate lava cakes are best enjoyed warm, straight from the oven—but life gets busy. If you need to store leftovers or prep ahead, here’s how to do it without sacrificing that gooey center.

Storing Baked Lava Cakes:

  • Refrigerator: Let the cakes cool completely, then cover tightly with plastic wrap or place in an airtight container. Store for up to 3 days.
  • Freezer: You can freeze baked lava cakes for up to 1 month. Wrap each cake in plastic wrap, then foil, and place them in a freezer-safe bag.

Note: Freezing may slightly alter the texture, but the molten center can still be preserved if reheated properly.

Best Practices for Reheating to Retain Gooey Center

When reheating, the goal is to warm the cake without overcooking the center. Here’s how to do it right:

MethodInstructionsBest For
OvenPreheat to 350°F, warm for 8–10 mins (covered loosely)Preserving texture
MicrowaveHeat for 20–30 secs max on medium powerQuick individual servings
Air FryerHeat at 320°F for 3–5 minsCrisp exterior + gooey center

Pro Tip: Always allow refrigerated cakes to sit at room temperature for 10 minutes before reheating to avoid cold spots.

Make-Ahead Strategy: Freezing Unbaked Lava Cakes

If you want truly fresh lava cakes on demand, freeze them unbaked. It’s a game-changer:

  1. Fill and prepare ramekins as usual.
  2. Wrap tightly in plastic wrap.
  3. Freeze until solid—up to 1 month.

When ready to bake, add 1–2 minutes to the usual bake time—no need to thaw.

This method is ideal for dinner parties or date nights when you want fresh lava cakes without last-minute prep.

Frequently Asked Questions (FAQs)

How to make a molten chocolate cake?

Start by melting dark chocolate and butter together. In a separate bowl, beat eggs and sugar until thick. Combine both mixtures, fold in a bit of flour and a pinch of salt, then pour the batter into buttered ramekins. Bake at 425°F for 11–13 minutes. The edges should be set while the center stays gooey. Serve immediately.

What is the origin of molten chocolate cake?

The molten chocolate cake has two potential origin stories. Chef Jean-Georges Vongerichten claims to have invented it accidentally in New York in the 1980s. Meanwhile, French chef Michel Bras is credited with developing a filled chocolate cake in 1981 using a frozen ganache center. Regardless of its roots, it became a global dessert sensation by the 1990s.

What does molten chocolate cake taste like?

It’s rich, smooth, and intensely chocolatey with a crisp outer layer and a luscious, molten interior. Served warm, it’s sweet but slightly bitter, with a melt-in-your-mouth texture that contrasts beautifully with cold sides like ice cream or berries.

What is the secret to chocolate lava cake?

The key secret is precise baking time. Pull the cakes out when the outer edge is firm but the center still jiggles. Also, use high-quality chocolate and don’t overmix the batter. Optional extras like freezing a ganache core can make the center even more luxurious.

Conclusion

Whether you’re a casual home cook or a seasoned baker, perfect chocolate lava cakes are an indulgent, show-stopping dessert you can master. With just a few ingredients and the right technique, you’ll get restaurant-quality results at home. From classic versions to daring new twists, lava cakes are endlessly versatile and always impressive.

For more recipes, visit our facebook page

No Bake Salted Caramel Cheesecake Cups – The Ultimate Easy Dessert Guide

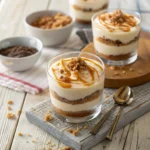
no bake salted caramel cheesecake cups with caramel drizzle

Introduction

No Bake Salted Caramel Cheesecake Cups are the ultimate answer to effortless elegance in dessert form. These creamy, dreamy treats combine the richness of cheesecake with the buttery sweetness of caramel plus that irresistible hit of sea salt all beautifully layered in individual cups. The best part? You don’t need an oven, a springform pan, or even baking skills.

Perfect for holidays, parties, or an indulgent night in, these dessert cups are quick to make, easy to serve, and hard to resist. Whether you’re a busy home cook or a dessert enthusiast looking to wow guests, this guide will walk you through everything from crust to caramel drizzle.

Print
clock clock iconcutlery cutlery iconflag flag iconfolder folder iconinstagram instagram iconpinterest pinterest iconfacebook facebook iconprint print iconsquares squares iconheart heart iconheart solid heart solid icon
no bake salted caramel cheesecake cups with caramel drizzle

No Bake Salted Caramel Cheesecake Cups


5 Stars 4 Stars 3 Stars 2 Stars 1 Star

No reviews

  • Author: Amellia
  • Total Time: 40 minutes
  • Yield: 6–8

Description

Creamy, dreamy, and no oven needed. Try these No Bake Salted Caramel Cheesecake Cups for your next gathering. Ready in minutes, gone in seconds.


Ingredients

Full-fat cream cheese, whipped cream, powdered sugar, vanilla extract, caramel sauce, crushed graham crackers or cookies, butter


Instructions

Mix and press crust, beat filling, fold cream, assemble layers, chill

Notes

Top with whipped cream and extra caramel

  • Prep Time: 20 minutes
  • Cook Time: 20 minutes

Why No Bake Salted Caramel Cheesecake Cups Are the Perfect Treat

The Irresistible Flavor Combo of Salted Caramel and Cheesecake

When it comes to crowd-pleasing desserts, No Bake Salted Caramel Cheesecake Cups strike the perfect balance between sweet and salty, creamy and crunchy. Salted caramel has exploded in popularity over the last decade, and for good reason—it adds a complex, luxurious depth to any dessert. Pair it with the smooth tang of cream cheese and a buttery crust, and you’ve got a spoonful of magic in every bite.

Salt enhances the natural sweetness of caramel while cutting through the richness of the cheesecake filling. This combination creates an elevated taste experience that’s both comforting and indulgent. Whether you’re making these for a party, a potluck, or just a weeknight treat, the flavor profile alone makes them a standout.

If you love quick, oven-free treats, try our Easy Pistachio Tiramisu — a creamy, nutty twist on the classic Italian favorite.

Benefits of No-Bake Desserts for Busy Schedules

One of the biggest advantages of no bake salted caramel cheesecake cups is their simplicity. There’s no baking involved, which means:

  • Faster prep time: No need to wait for the oven to preheat or the cheesecake to bake and cool.
  • Beginner-friendly: Even kitchen newbies can pull off this recipe with confidence.
  • No oven required: Ideal for hot summer days or small kitchens without full baking setups.
  • Make-ahead convenience: These cups can be chilled and ready to serve when you need them.

Busy parents, students, and party hosts love how quick and foolproof no-bake desserts are. You can prep them in advance, keep them chilled, and serve them without any stress. Plus, individual dessert cups mean zero slicing or messy servings just grab and go.

Key Ingredients You’ll Need for No Bake Salted Caramel Cheesecake Cups

Main Components: Cream Cheese, Caramel, Crust Base

The magic of no bake salted caramel cheesecake cups begins with just a few staple ingredients, most of which you probably already have in your kitchen. These simple elements come together to create a luxurious dessert that’s quick to assemble and sure to impress.

Here’s a breakdown of the essentials:

IngredientPurposeTips
Cream CheeseForms the rich, tangy base of the cheesecake layerUse full-fat for creamier texture
Heavy Whipping CreamAdds lightness and volume to the fillingChill before whipping
Salted Caramel SauceSignature flavor and toppingUse high-quality for best taste
Graham Crackers / BiscoffForms the crunchy crust layerMix with melted butter
ButterBinds the crust and adds richnessUnsalted or salted both work
Powdered SugarSweetens the cheesecake mixtureSift to avoid lumps
Vanilla ExtractEnhances flavor depthPure extract preferred

The focus keyword appears naturally throughout the ingredient discussion, keeping SEO strong without sounding forced.

Pro Tip: Always use full-fat cream cheese for a smooth, firm texture. Low-fat versions often result in a runny filling that won’t set properly in cups.

Want something warm and indulgent? These Perfect Chocolate Lava Cakes are rich, gooey, and bake in under 15 minutes.

Store-Bought vs. Homemade Salted Caramel Sauce

Here’s where the debate gets delicious: should you make your own caramel sauce or buy one from the store?

Store-Bought Salted Caramel Pros

  • Saves time
  • Consistent flavor
  • No candy thermometer needed

Homemade Salted Caramel Pros

  • Customizable salt and sweetness levels
  • Richer, deeper flavor
  • Impressive to guests

If you’re in a rush, store-bought caramel is totally fine. Just look for one that’s thick, rich, and preferably made with real cream and butter. Avoid thin syrups—they’ll run right through your layers and make the dessert messy.

How to Make the Perfect No Bake Cheesecake Base

Types of Crusts: Graham Cracker, Biscoff, and More

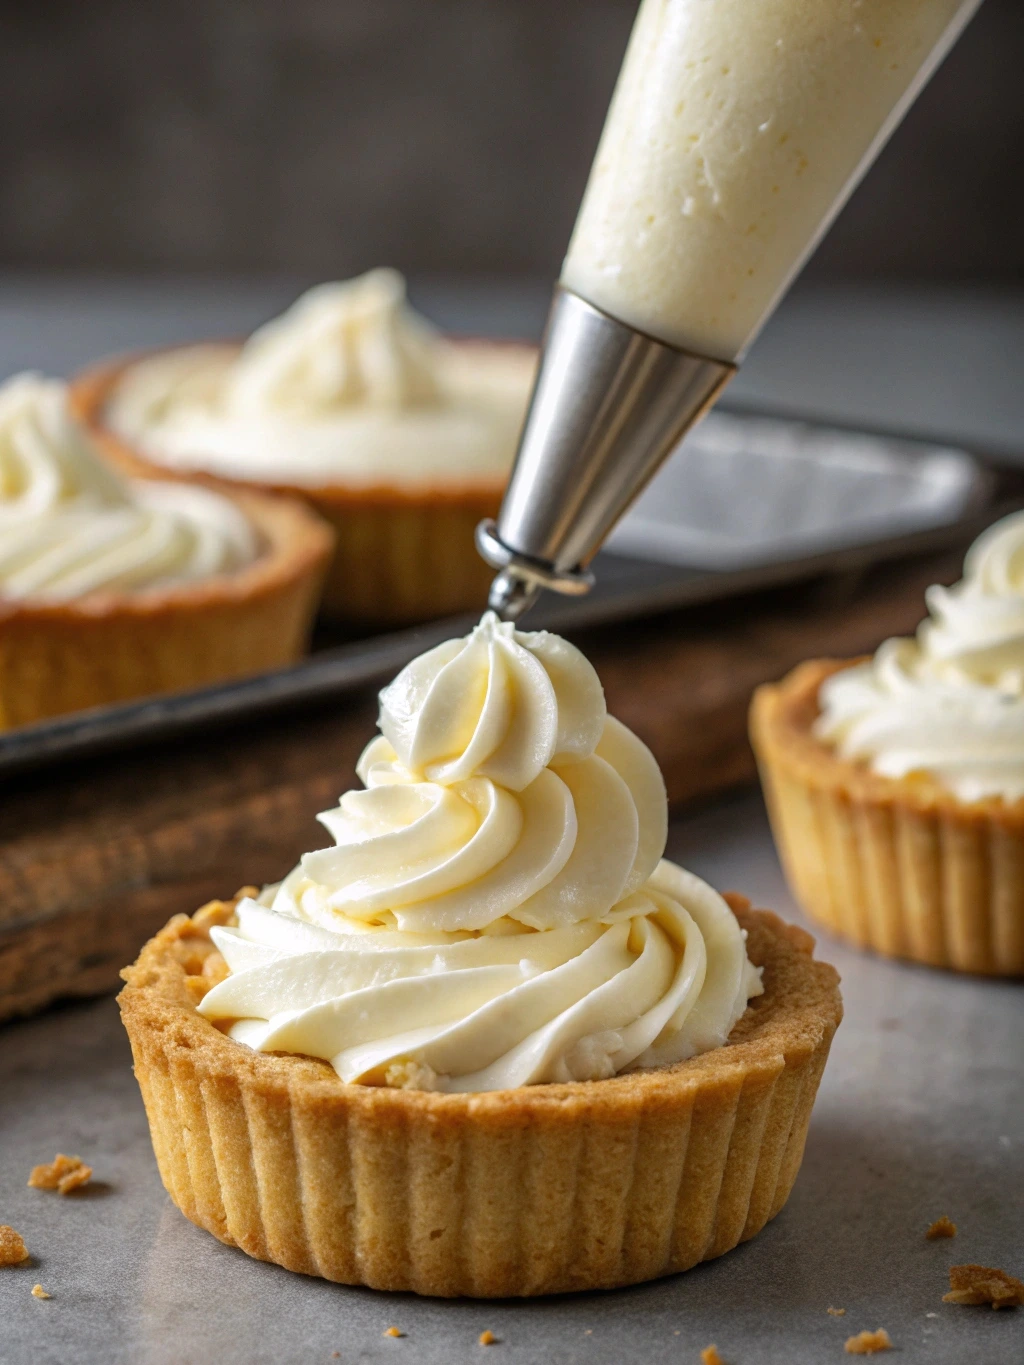
piping cheesecake filling into salted caramel cheesecake cups

A great crust sets the foundation for your no bake salted caramel cheesecake cups, adding contrast to the creamy filling and enhancing the overall texture. The best part? You’ve got options.

Here are three crust variations that pair beautifully with the salted caramel flavor:

Crust TypeFlavor ProfileBest For
Graham CrackerLightly sweet, slightly nuttyClassic cheesecake lovers
Biscoff CookieSpiced, rich, with caramel undertonesEnhancing salted caramel notes
Oreo Crust (no filling)Chocolatey, denseThose craving a bold flavor twist

Tip: For each version, combine crushed cookies with melted butter and a pinch of salt. Press the mixture into the bottom of your dessert cups to create a firm, flavorful base.

Step-by-Step Crust Preparation for Dessert Cups

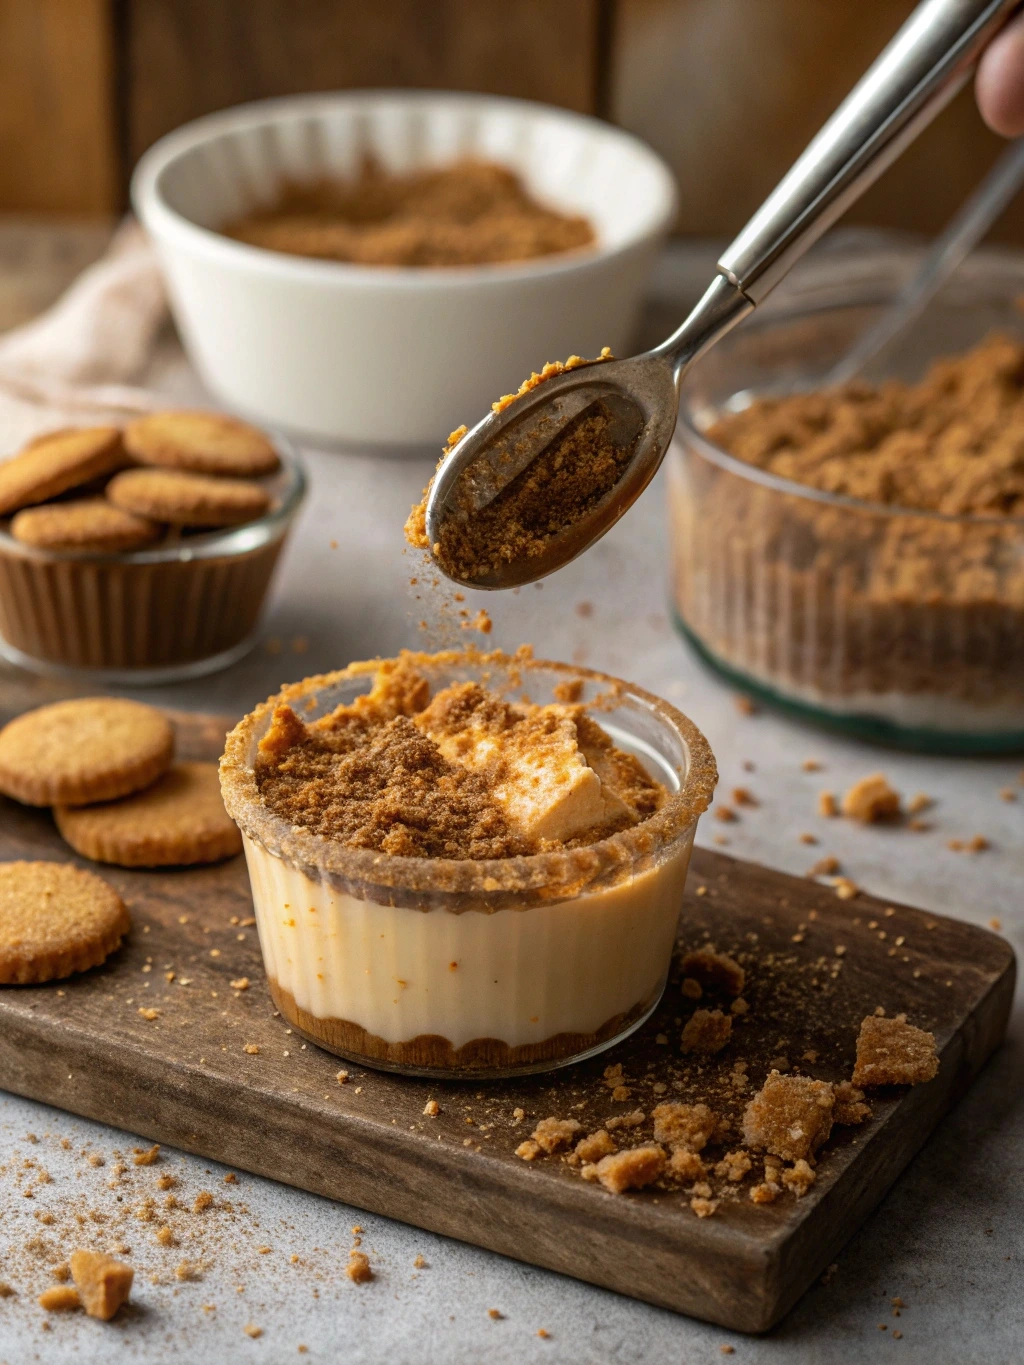
pressing crust for no bake salted caramel cheesecake cups

Making the crust is the easiest part, and it takes just 10 minutes from start to finish.

Step-by-Step Instructions:

  1. Crush the Base: Use a food processor or zip-top bag with a rolling pin to finely crush your graham crackers, Biscoff cookies, or Oreos.
  2. Mix with Butter: In a bowl, combine about 1 ½ cups of crumbs with 5 tablespoons of melted butter and a pinch of salt. Stir until all crumbs are moist.
  3. Portion and Press: Spoon a few tablespoons into each dessert cup. Press down gently with the back of a spoon to create an even, compact crust layer.
  4. Chill Briefly: Place the cups in the fridge for 10–15 minutes to help the crust set before adding the filling.

This crust adds a buttery crunch that contrasts beautifully with the soft, airy cheesecake layer. Whether you go traditional with graham crackers or spiced with Biscoff, you’re starting your dessert cups off on the right foot.

Preparing the Cheesecake Filling for Your Cups

Achieving a Smooth and Creamy Cheesecake Layer

The heart of any no bake salted caramel cheesecake cup is the silky cheesecake filling. It should be smooth, rich, and just firm enough to hold its shape in the cup, while still melting in your mouth with every bite.

Here’s how to create that perfect no-bake cheesecake texture:

1. Use Room-Temperature Cream Cheese:
Cold cream cheese is hard to blend smoothly. Let it sit at room temperature for about 30 minutes to an hour before mixing.

2. Whip the Cream Separately:
To add fluffiness and volume, beat heavy cream until it forms stiff peaks. Fold this into your cream cheese mixture at the end for a mousse-like finish.

3. Blend Until Velvety:
Use an electric mixer to beat the cream cheese with powdered sugar and vanilla extract until completely smooth—no lumps. Add a tablespoon or two of caramel sauce into the mix to infuse the filling with a sweet, buttery flavor that ties the whole dessert together.

4. Fold, Don’t Stir:
Once your whipped cream is ready, gently fold it into the cream cheese base using a spatula. This keeps the texture light and airy, perfect for layering.

IngredientAmount (for 6–8 cups)
Full-fat Cream Cheese16 oz (2 blocks)
Powdered Sugar½ cup
Vanilla Extract1 tsp
Heavy Whipping Cream¾ cup, whipped to stiff peaks
Salted Caramel Sauce2 tbsp (optional in filling)

Flavor Enhancements and Mix-In Ideas

Want to make your no bake salted caramel cheesecake cups extra special? Here are some flavorful twists you can easily add to the filling:

  • Espresso powder: Adds a mocha flair that complements caramel perfectly.
  • Sea salt flakes: Stir in a pinch for a richer salted caramel flavor.
  • Maple syrup: Swap out caramel for a fall-friendly variation.
  • Mascarpone cheese: Blend it with cream cheese for a smoother, slightly sweeter base.
  • Toffee bits or mini chocolate chips: Fold them in for a fun texture surprise.

Assembling Your No Bake Salted Caramel Cheesecake Cups

finished no bake salted caramel cheesecake cups with whipped topping

Layering Techniques for Visual Appeal

Now that you’ve nailed the crust and perfected the cheesecake filling, it’s time to assemble your no bake salted caramel cheesecake cups into beautiful, eye-catching desserts that look as good as they taste.

Layering matters. Here’s how to do it step by step for professional-looking results:

Step 1 – Start with the Crust Layer
Spoon about 2 tablespoons of your prepared crust mixture into the bottom of each dessert cup. Use the back of a spoon or a tart tamper to press it down evenly.

Step 2 – Add the Cheesecake Filling
Scoop or pipe the creamy cheesecake filling over the crust layer. A piping bag gives the cleanest finish and keeps the layers distinct. Fill each cup about ¾ full to leave room for toppings.

Step 3 – Swirl or Layer Salted Caramel Sauce
Drizzle a teaspoon (or more) of salted caramel sauce on top of the cheesecake layer. For a marbled look, gently swirl with a skewer or toothpick. Want bold layers? Add the caramel as a middle layer before the final topping.

Step 4 – Optional Garnishes

  • Sprinkle with sea salt flakes for that signature salted finish
  • Add crushed pretzels, chocolate shavings, or toffee bits for texture
  • Top with whipped cream and a drizzle of extra caramel just before serving

This method ensures every bite contains all three layers—crunchy, creamy, and gooey.

For a creative dessert that blends cultures and textures, don’t miss our Baklava Bread Pudding — flaky, custardy, and unforgettable.

Tips for Clean and Neat Presentation

Presentation plays a big role, especially if you’re serving these cups for parties, holidays, or events. Here are a few pro tips to keep your no bake salted caramel cheesecake cups Instagram-worthy:

  • Use clear dessert cups: So your beautiful layers are visible
  • Wipe the insides of the cup with a damp cloth: Remove smudges after filling
  • Chill before garnishing: Firm filling = cleaner drizzle and toppings
  • Pipe with purpose: Use a star tip for the whipped cream topping to add flair

Choosing the Right Dessert Cups and Serving Sizes

Best Cup Sizes for Portion Control and Aesthetics

The container you use can make or break the look (and practicality) of your no bake salted caramel cheesecake cups. The right dessert cup balances visual appeal with the perfect serving size.

Here are some top cup options to consider:

Cup SizeVolumeIdeal For
4 ozSmallKids, mini desserts, bite-sized treats
6 ozMediumBalanced portions for most adults
8 ozLargeHearty servings, indulgent dessert fans

For gatherings or events, the 6 oz cup hits the sweet spot—not too little, not too much. It’s generous enough to satisfy without overwhelming, and it allows space for multiple layers and garnishes.

Tip: Transparent plastic, acrylic, or glass cups work best. Not only do they hold their shape, but they also let guests admire the beautiful layers of crust, cheesecake, and caramel.

Glass vs. Plastic vs. Eco-Friendly Dessert Cup Options

The material of your dessert cups also matters especially if you’re thinking about sustainability, aesthetics, or convenience. Here’s how to choose:

MaterialProsCons
GlassElegant, reusable, enhances visual appealHeavy, breakable, less portable
Plastic (clear)Lightweight, disposable, clear for layeringLess eco-friendly, can look cheap
Eco-friendly (bamboo, palm, etc.)Sustainable, unique presentationOften not transparent, more rustic look

If you’re serving at a casual event or picnic, disposable clear plastic works great. For weddings, holidays, or formal occasions, go with glass for that elevated feel. Eco-friendly cups are excellent for outdoor parties with a natural vibe.

Make-Ahead Tips and Storage Guidelines

How Far in Advance You Can Prepare the Cups

One of the best things about no bake salted caramel cheesecake cups is how wonderfully they fit into a make-ahead schedule. You can prepare them well in advance and simply pull them out when it’s time to serve—making them perfect for parties, events, or weekly dessert meal prep.

Here’s a general guide:

Prep TimelineRecommended Action
Same DayAssemble in the morning, serve by evening
1–2 Days AheadIdeal window for flavor melding and best texture
Up to 4 Days in AdvanceStill great, but garnish closer to serving time

For best results, store the cheesecake cups in the fridge, covered tightly with plastic wrap or individual lids if using dessert containers. This keeps them fresh, prevents drying out, and keeps fridge odors away.

Pro Tip: If you’re prepping for a party, hold off on adding garnishes like whipped cream, caramel drizzle, or toppings until just before serving. This keeps everything fresh and picture-perfect.

Storing and Freezing Suggestions for Best Results

Need to prep even further in advance? You can freeze these cheesecake cups yes, even with the caramel!

To Freeze:

  1. Assemble the crust and filling (skip garnishes).
  2. Cover each cup tightly with plastic wrap and aluminum foil.
  3. Freeze for up to 1 month.

To Serve from Frozen:

  • Transfer to the fridge 6–8 hours before serving.
  • Add your caramel drizzle and toppings once fully thawed.

Avoid refreezing once thawed to maintain texture and taste. And while freezing is fine, fresh refrigerated versions maintain the creamiest consistency.

Creative Variations of Salted Caramel Cheesecake Cups

Mini Cheesecakes with Different Toppings

While the classic no bake salted caramel cheesecake cups are hard to beat, you can easily switch things up with creative toppings that add texture, flavor, and visual flair. These variations are perfect for customizing your cups based on the season, event theme, or personal cravings.

Here are some irresistible topping combos:

ToppingFlavor BoostOccasion
Crushed PretzelsSalty crunch to balance sweetnessGame days, casual events
Candied PecansNutty sweetness with textureFall gatherings
Chocolate Ganache DrizzleRichness and decadenceValentine’s Day
Sliced Bananas + CaramelBanana foster-style twistBrunch or tropical theme
Apple pie fillingCozy and comfortingThanksgiving

You can even create a cheesecake cup “bar” with various toppings for guests to personalize their own. It’s fun, interactive, and perfect for parties.

Turning It into a Single Large No-Bake Cheesecake

Yes, you can absolutely transform this recipe into one large no bake salted caramel cheesecake if you prefer slicing over scooping. It’s the same great taste, just in a shareable format.

How to Do It:

  1. Use a 9-inch springform pan (or similar dish) for a sturdy crust and clean slices.
  2. Press the crust evenly into the bottom and slightly up the sides.
  3. Spread the filling gently with a spatula to level it out.
  4. Drizzle the caramel in a swirl on top and chill at least 4–6 hours before slicing.
  5. Add garnishes just before serving to preserve their look and texture.

This variation is great for formal dinners, family gatherings, and holiday spreads.

Pairings and Presentation Ideas for Special Occasions

Drink Pairings and Serving Suggestions

To elevate your no bake salted caramel cheesecake cups beyond a simple dessert and turn them into a full sensory experience, pair them with complementary drinks and thoughtful serving elements. Whether you’re hosting a formal event or a casual dinner, these pairings enhance the rich, sweet, and salty balance of the dish.

Perfect Drink Pairings:

DrinkWhy It Works
Espresso or CoffeeCuts through the richness; enhances the caramel flavor
Irish Cream LiqueurCreamy and sweet with a mild kick—pairs seamlessly
Dessert WineMoscato or late-harvest Riesling balance salt and sweetness
Spiked Apple CiderA cozy fall-friendly match for caramel notes
Cold Brew with MilkRefreshing and balanced—great for warm days

Serve drinks in elegant glassware and garnish with cinnamon sticks or a caramel drizzle on the rim for extra flair.

Decor and Plating Tips for Parties and Gatherings

Presentation transforms these cups from a simple dessert to a showstopper. Here are easy, impressive ideas to make your no bake salted caramel cheesecake cups pop on any dessert table:

1. Themed Garnishes:

  • Autumn: Top with mini caramel apples on skewers.
  • Holiday: Sprinkle edible gold dust or crushed candy canes.
  • Summer: Add a fresh raspberry and mint leaf.

2. Serving Trays & Tiers:
Place your cups on mirrored trays, wooden dessert boards, or tiered cupcake stands to add height and drama to the dessert table.

3. Personalized Tags or Flags:
Add name tags, flavor labels, or “Made with Love” flags using toothpicks and paper for weddings and baby showers.

4. Napkins and Spoons with Style:
Coordinate your spoons and napkins with the event’s color scheme. Mini gold spoons or wooden dessert forks look great and are eco-friendly too.

Your Questions About No Bake Salted Caramel Cheesecake Cups Answered

Can I use store-bought salted caramel sauce?

Absolutely. Store-bought salted caramel sauce works perfectly for these cheesecake cups and is a great time-saver. Look for a thick, rich sauce made with real cream and butter. Avoid runny syrups, as they can bleed into the cheesecake layer and affect presentation. If you’re aiming for a more homemade taste, you can enhance a store-bought version by warming it and adding a pinch of sea salt.

Can I make this as one large cheesecake instead?

Yes, you can easily convert this recipe into a single, full-size no bake salted caramel cheesecake using a 9-inch springform pan. Prepare the crust and filling as described, layer them in the pan, and chill for 4–6 hours or until set. Drizzle with caramel just before serving for a stunning centerpiece dessert.

What size dessert cups should I use?

The ideal cup size is 6 oz—just enough for satisfying portions while keeping the presentation elegant and balanced. Smaller 4 oz cups are great for bite-sized servings or party samplers, while 8 oz cups are perfect for indulgent dessert lovers.
Use clear plastic or glass cups to showcase the beautiful layers of crust, cheesecake, and caramel.

Can I prepare these cheesecake cups ahead of time?

Yes, these are perfect make-ahead desserts. Prepare and assemble your no bake salted caramel cheesecake cups up to 2–3 days in advance and store them in the fridge. Just wait to add toppings or garnishes (like whipped cream or caramel drizzle) until shortly before serving to keep them looking fresh.
They can even be frozen (without toppings) for up to a month. Simply thaw in the refrigerator for several hours before serving.

Why These Cheesecake Cups Deserve a Spot in Your Recipe Box

No bake salted caramel cheesecake cups check every box: easy to prepare, crowd-pleasing, visually stunning, and endlessly adaptable. With a velvety cream cheese filling layered over a buttery crust and topped with golden salted caramel, each spoonful is a perfect bite of indulgence. Whether you’re hosting a dinner party, planning a holiday spread, or just need a quick make-ahead dessert, these cups deliver big flavor with minimal effort.
You’ve learned how to choose the best ingredients, assemble like a pro, prepare ahead, and even personalize with toppings and creative variations. You’ve also got answers to common questions that home bakers often ask.
From mini party cups to full-sized showstoppers, the flexibility of this no-bake treat means it can fit almost any occasion. The only hard part? Trying not to eat them all at once.

For more recipes, visit our facebook page